7. RecordXR Studio
7.V1.9-01
RecordXR Studio هو أداة تحرير واقع افتراضي تتيح للمستخدمين قص وتقصير ودمج تسجيلات رباعية الأبعاد تم إنشاؤها باستخدام RecordXR. يتيح لك تحرير وتزامن الصوت، وإضافة الأفاتارات لتفاعلات افتراضية أكثر تفاعلاً، وإنشاء نسخ متعددة اللغات عن طريق تراكب مسارات صوتية بلغات مختلفة.
تعلم كيفية تحرير تسجيلات Medicalholodeck RXR باستخدام RecordXR Studio.
انتقل إلى قسم RecordXR في المكتبة واختر التسجيل الذي تريد تحريره.
إذا كنت تستخدم سماعة رأس مستقلة، تحتاج إلى توصيلها بالكمبيوتر ونقل الملف يدويًا.
في PC-VR، سيتم حفظ التسجيل تلقائيًا كملف RXR على سطح المكتب بعد الضغط على زر التصدير.
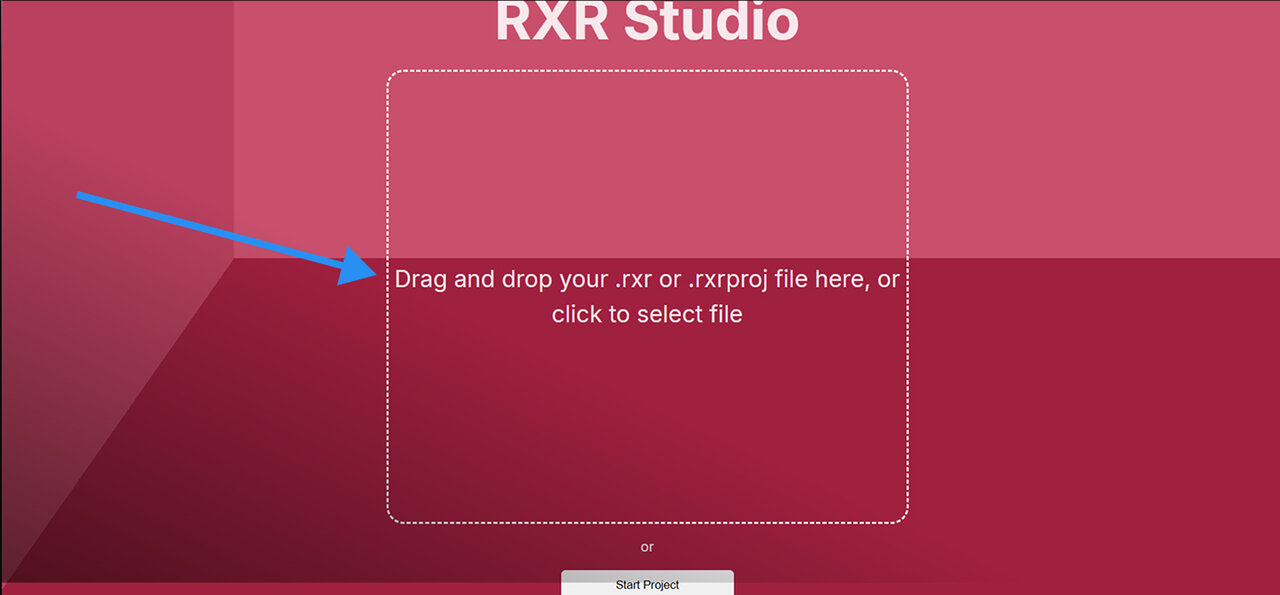
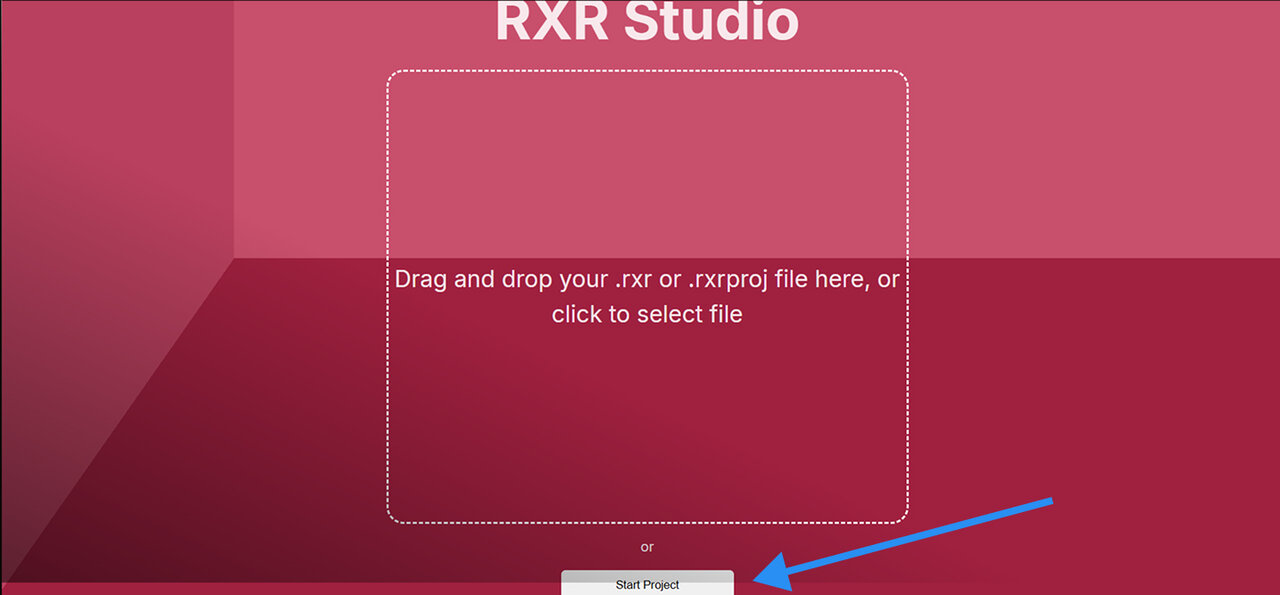
بعد ذلك، افتح RecordXR Studio بكتابة cut.rxr.app في متصفحك. اسحب وأفلت ملف RXR في النافذة، أو انقر على "Start Project" لفتح مشروع فارغ.
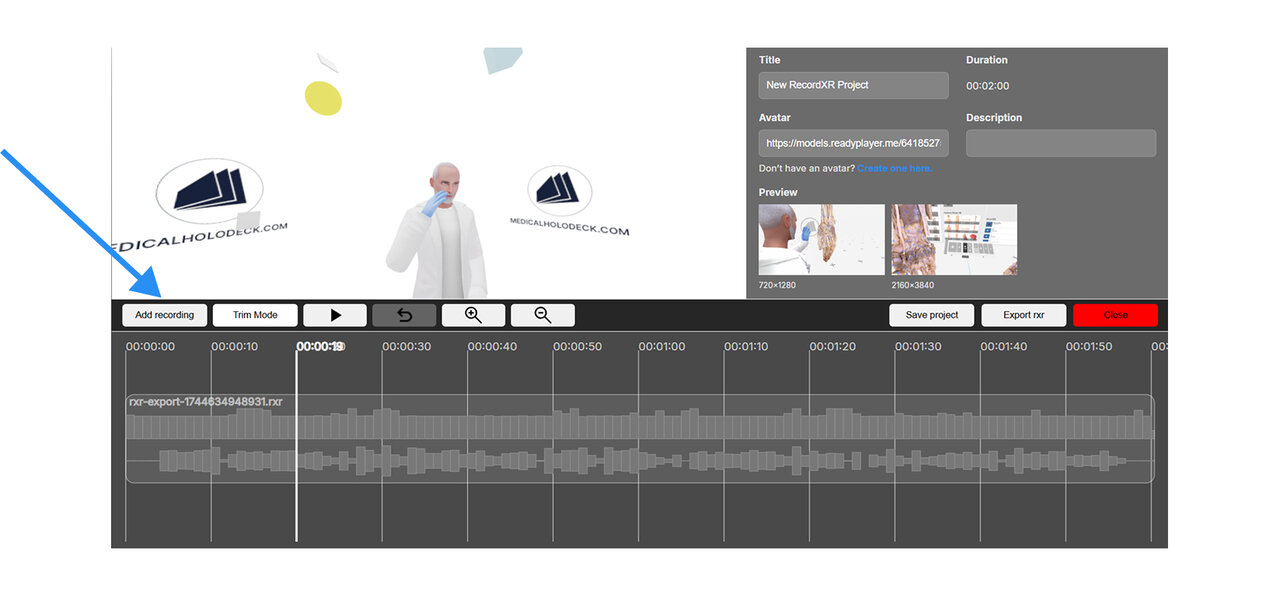
انقر على "Add Recording" واختر ملف RXR من جهاز الكمبيوتر. يمكنك إضافة ملف واحد فقط في كل مرة. يحتفظ المشروع ببيانات وصفية الملف الأول، ولكن يمكنك تحديثها لاحقًا إذا لزم الأمر.
لمعاينة لحظة محددة في التسجيل، انقل رأس التشغيل إلى الموضع المطلوب على الخط الزمني. استخدم الماوس للتنقل في نافذة المعاينة ثلاثية الأبعاد. انقر واسحب للتدوير، ولف للتكبير، وضع الكاميرا حسب الحاجة.
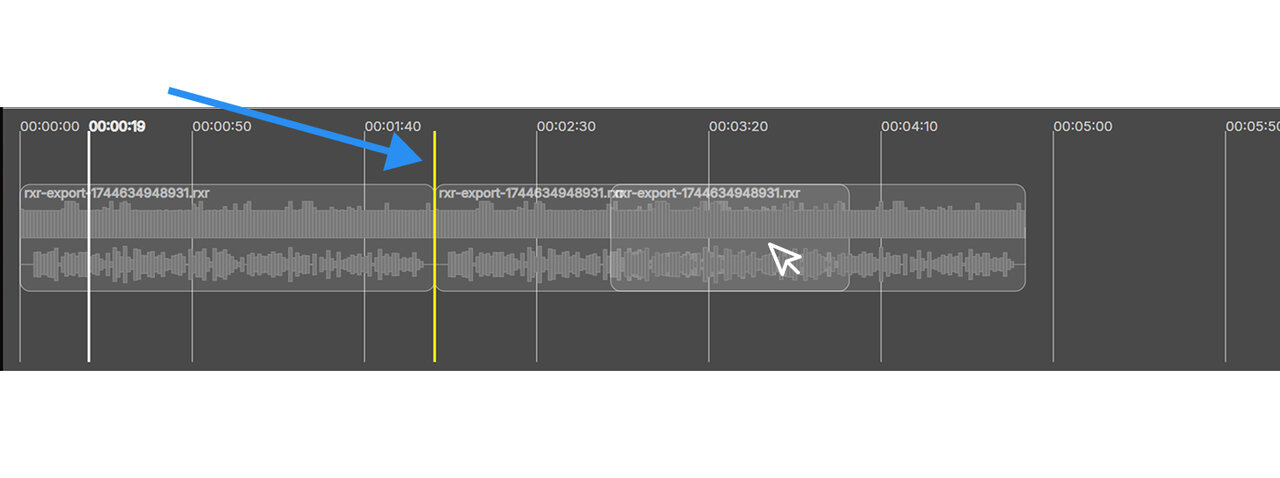
لإعادة ترتيب التسجيلات، اسحبها إلى موضع جديد. الخط الأصفر يظهر مكان وضع المقطع.
لقص تسجيل، اختر "Trim Mode". ستظهر مقابض حمراء في بداية ونهاية كل مقطع. اسحبها لتحديد الأجزاء المراد إزالتها، ثم انقر على زر "Trim" الأصفر للتأكيد. لإلغاء القص، انقر على الزر الأحمر.
لتقسيم تسجيل إلى جزأين في لحظة محددة، انقل رأس التشغيل إلى الموضع المطلوب وانقر على "Cut". سيتم تقسيم التسجيل إلى مقطعين منفصلين يمكن تحريرهما بشكل مستقل.
للمشاهدة المباشرة لتسجيلك في المحرر، انقر على زر التشغيل. سيتحرك رأس التشغيل تلقائيًا أثناء تشغيل التسجيل. اضغط إيقاف مؤقت لإيقاف التشغيل.
حدد زر التراجع لعكس آخر إجراء قمت به.
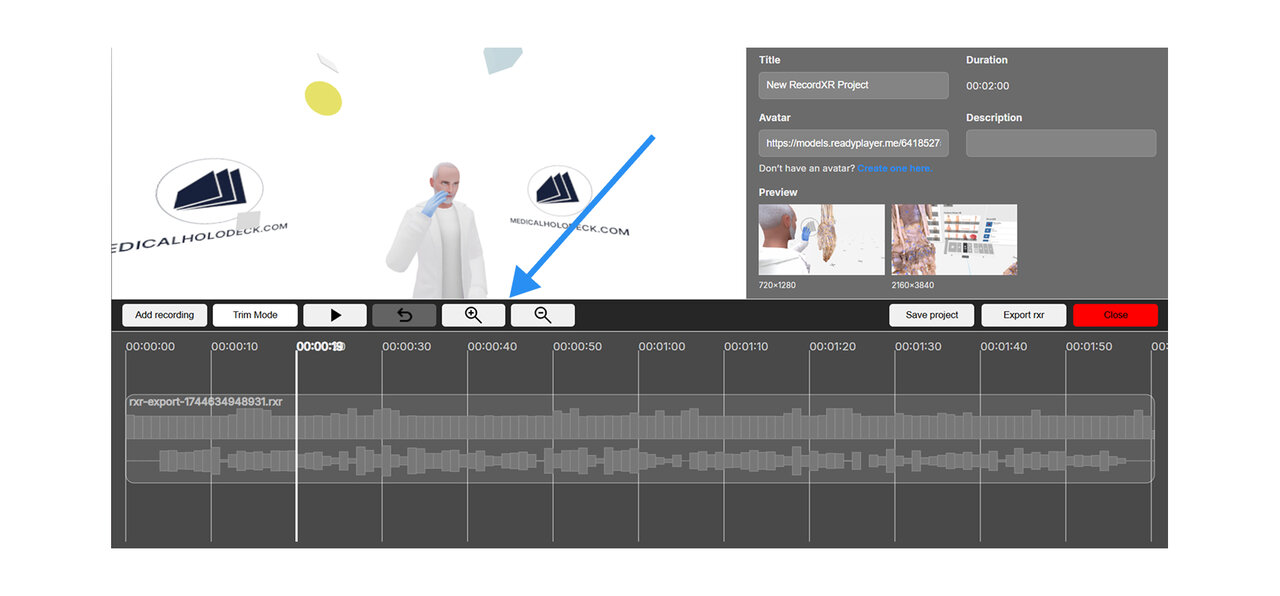
استخدم أزرار التكبير والتصغير لضبط عرض الخط الزمني. يمكنك أيضًا استخدام عجلة التمرير في الماوس للتكبير أو التصغير في الخط الزمني.
انقر على مسار الصوت المطلوب لإظهار وظائف تحرير الصوت.
لاستبدال الصوت في تسجيلك، انقر على "Replace Audio". اختر ملف الصوت من مستكشف الملفات الذي تريد استخدامه كبديل.
حدد "Translate Audio" لتغيير لغة التسجيل. أدخل مفتاح API الخاص بـ Eleven Labs إذا كان لديك حساب بالفعل. إذا لم يكن لديك، انتقل إلى elevenlabs.io لإنشاء واحد.
إذا كنت تريد حفظ الصوت الحالي، انقر على "Save Audio". سيتم تنزيله إلى جهاز الكمبيوتر بصيغة MP4.
لحذف التسجيل نهائيًا، انقر على "Delete Recording".
انقر على "Cancel" لإغلاق النافذة.
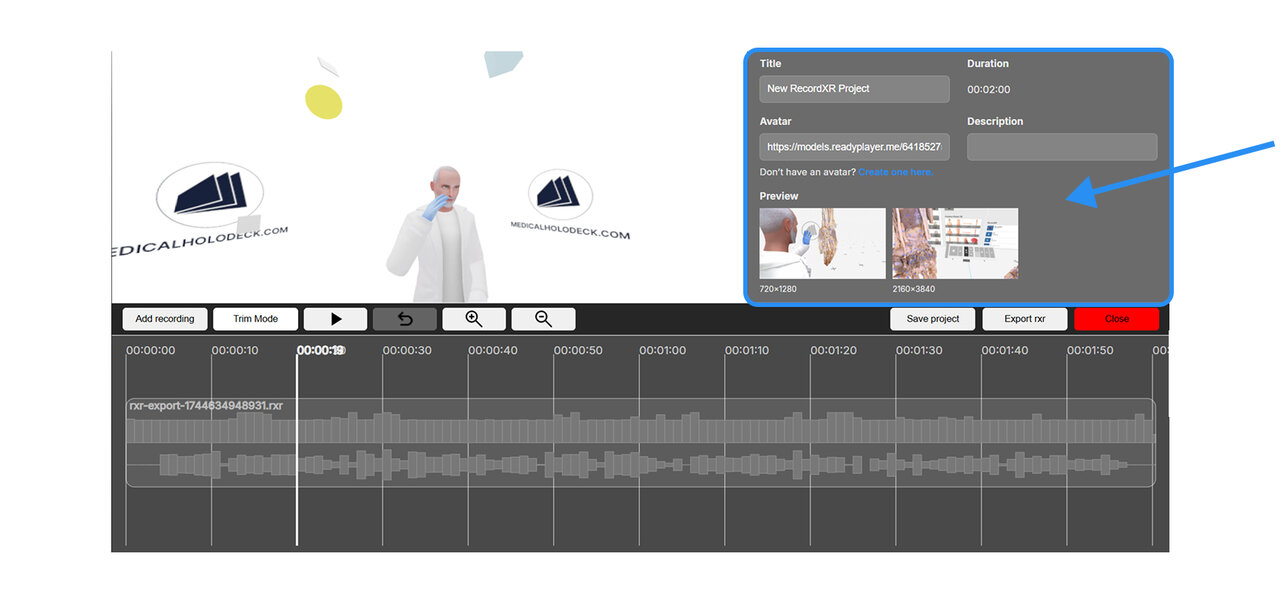
انتقل إلى قسم البيانات الوصفية لتحرير عنوان المشروع والوصف وصور المعاينة. انقر على الرابط أسفل حقل الصورة الرمزية لتصميم صورتك الرمزية. بمجرد الاستعداد، الصق رابط URL الخاص بها هناك. اختر "Reset" لإلغاء التغييرات.
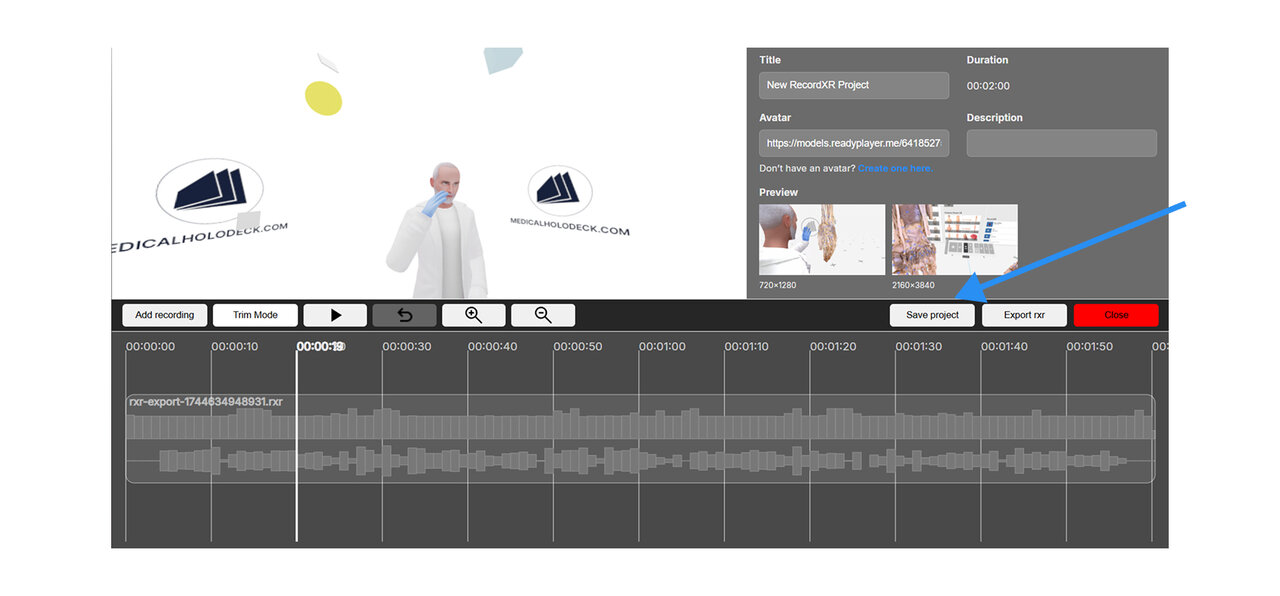
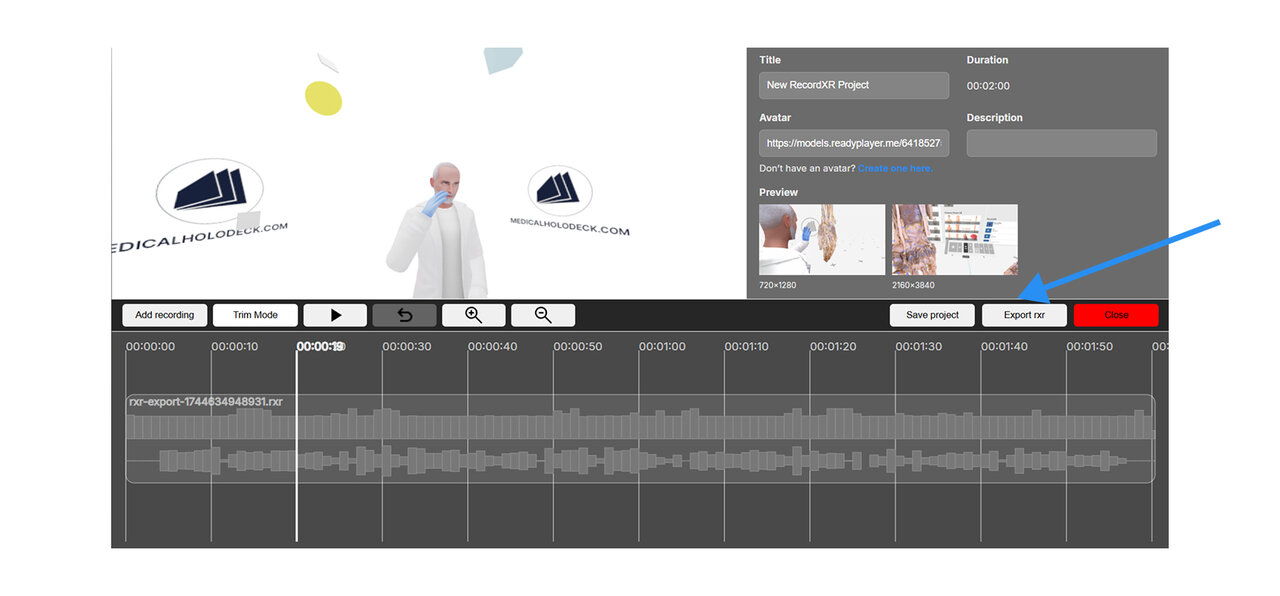
انقر على "Save Project" لتنزيل ملف المشروع. يمكن إعادة فتح هذا الملف لاحقًا في RecordXR Studio. لتوليد ملف RXR نهائي، انقر على "Export RXR".
7.A البداية السريعة
7.A.V1.9-01
7.A.1
الحصول على التسجيلات من Medicalholodeck
7.A.1.V1.9-01
انتقل إلى قسم RecordXR في لوحة المكتبة. حدد التسجيل الذي ترغب في تصديره وانقر على زر تصدير/مشاركة. سيتم حفظ الملف كملف .RXR وتصديره تلقائيًا إلى سطح المكتب الخاص بك.

لمعرفة المزيد عن إنشاء التسجيلات في تطبيق Medicalholodeck، راجع الدليل الخاص بـ RecordXR على الموقع الإلكتروني.
7.A.2
افتح RecordXR Studio
7.A.2.V1.9-01
الوصول إلى RecordXR Studio هنا.
7.A.3
افتح مشروعًا
7.A.3.V1.9-01
هناك طريقتان لبدء مشروع:
الخيار 1: السحب والإفلات
قم بإسقاط ملف .RXR أو .rxrproj في المنطقة المخصصة للبدء.
الخيار 2: بدء جديد
انقر على زر بدء المشروع لفتح مشروع جديد.
7.A.4
إضافة تسجيلات
7.A.4.V1.9-01
لإضافة تسجيل إلى مشروعك، انقر على زر إضافة تسجيل وتصفح عن ملف .RXR المطلوب على جهاز الكمبيوتر الخاص بك. يجب إضافة التسجيلات واحدة تلو الأخرى.
لاحظ أن المشروع يحتفظ تلقائيًا بالبيانات التعريفية من أول تسجيل تم تحميله. يمكن تغييرها لاحقًا في قسم البيانات التعريفية.
يتم وضع التسجيلات الجديدة في نهاية الخط الزمني.
7.A.5
تكبير/تصغير
7.A.5.V1.9-01
لتعديل عرض الخط الزمني استخدم التكبير/التصغير. التكبير للتعديلات الدقيقة أو التصغير للرؤية الكاملة يكون مفيدًا بشكل خاص عند القص أو إعادة الترتيب.
7.A.6
تغيير الترتيب
7.A.6.V1.9-01
لإعادة ترتيب التسجيلات داخل الخط الزمني، انقر واسحب التسجيل إلى الموضع المطلوب المحدد بخط عمودي أصفر. استخدم مفاتيح الأسهم على لوحة المفاتيح للتحرك عبر الخط الزمني لأنه لا يتم التمرير تلقائيًا.
7.A.7
قص
7.A.7.V1.9-01
لقص تسجيل، انقر على زر وضع القص. ستظهر مقابض حمراء في بداية ونهاية كل ملف. اسحب هذه المقابض لتحديد الجزء المراد قطعه وانقر على زر القص الأصفر لتطبيق التغييرات.
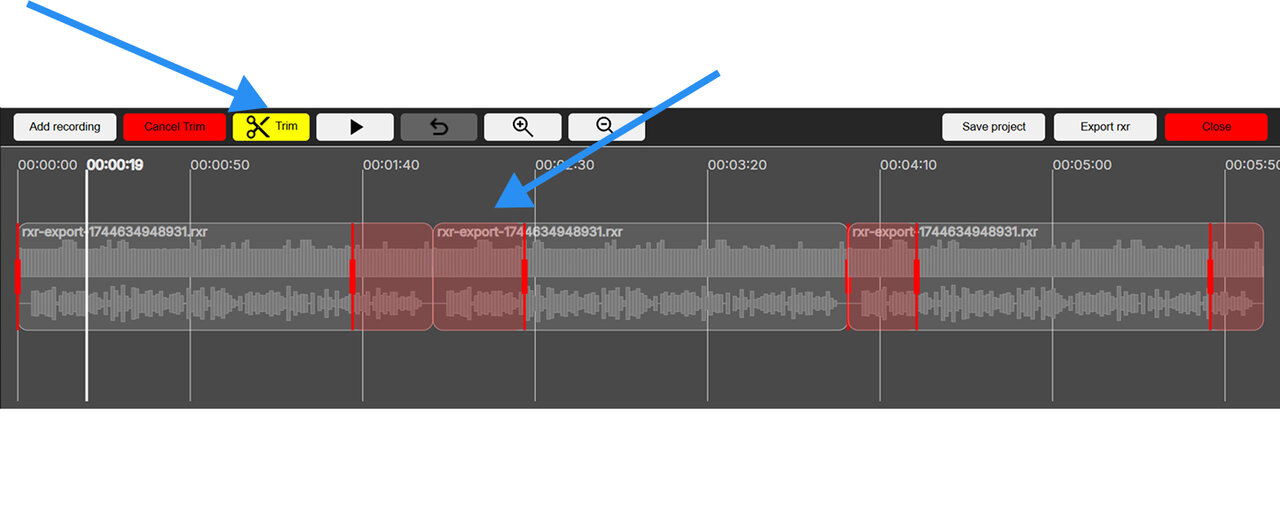
للخروج من وضع القص دون تطبيق أي تغييرات، انقر على زر إلغاء القص الأحمر.

7.A.8
تعيين البيانات الوصفية
7.A.8.V1.9-01
يمكن تعديل العنوان و الوصف و رموز المعاينة لمشروعك في قسم البيانات الوصفية.
7.A.9
إضافة صورة رمزية
7.A.9.V1.9-01
يمكن إضافة صورة رمزية مخصصة لتسجيلك. انقر على رابط “إنشئ واحدة هنا” أسفل الحقل لتصميم الصورة الرمزية الخاصة بك. بمجرد الانتهاء، انسخ عنوان URL الخاص بها والصقه في حقل الصورة الرمزية داخل قسم البيانات الوصفية.
7.A.10
حفظ المشروع
7.A.10.V1.9-01
لحفظ مشروعك، انقر على زر حفظ المشروع. سيتم تنزيل المشروع على جهاز الكمبيوتر الخاص بك بامتداد .rxrproj.
لاحظ أن هذا ملف مشروع، وليس تسجيلًا. لا يمكن إعادة فتحه إلا داخل RecordXR Studio.
7.A.11
تصدير ملف .RXR
7.A.11.V1.9-01
لتصدير تسجيل من المشروع المفتوح، انقر على زر تصدير RXR. سيتم حفظ التسجيل على جهاز الكمبيوتر الخاص بك كملف .RXR ويمكن بعد ذلك فتحه في Medicalholodeck.
7.A.12
الخروج من المنصة
7.A.12.V1.9-01
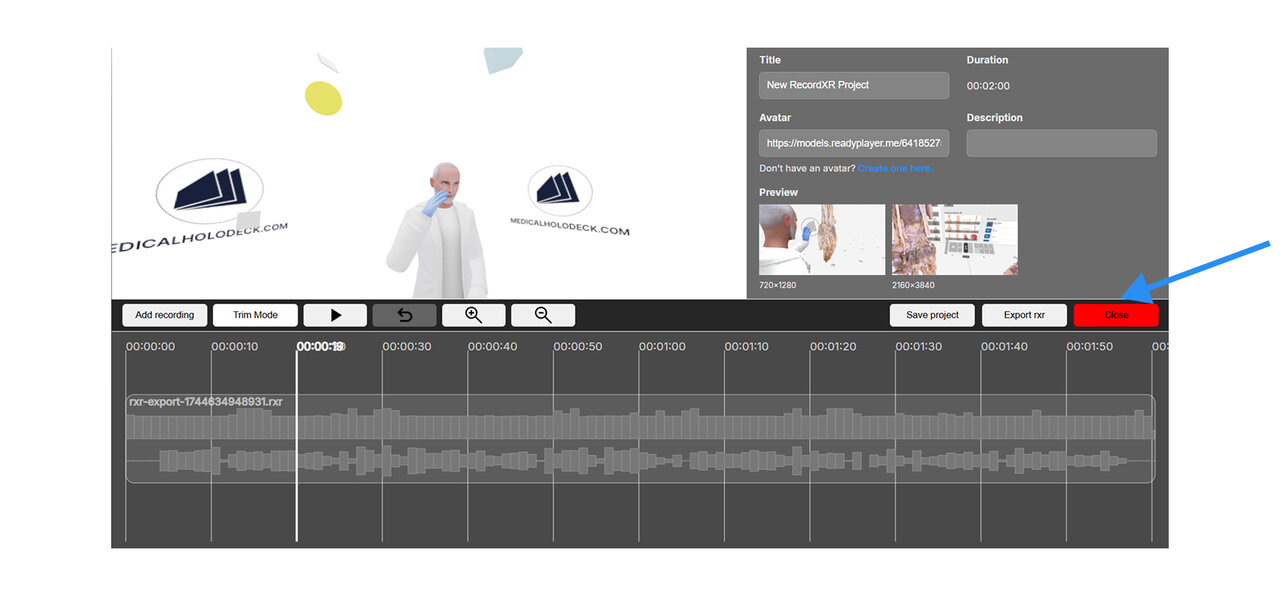
للخروج من RecordXR Studio، انقر على زر إغلاق أو أغلق علامة تبويب المتصفح.
تأكد من حفظ عملك قبل الخروج لتجنب فقدان أي تقدم.
7.A.13
فتح التسجيل
7.A.13.V1.9-01
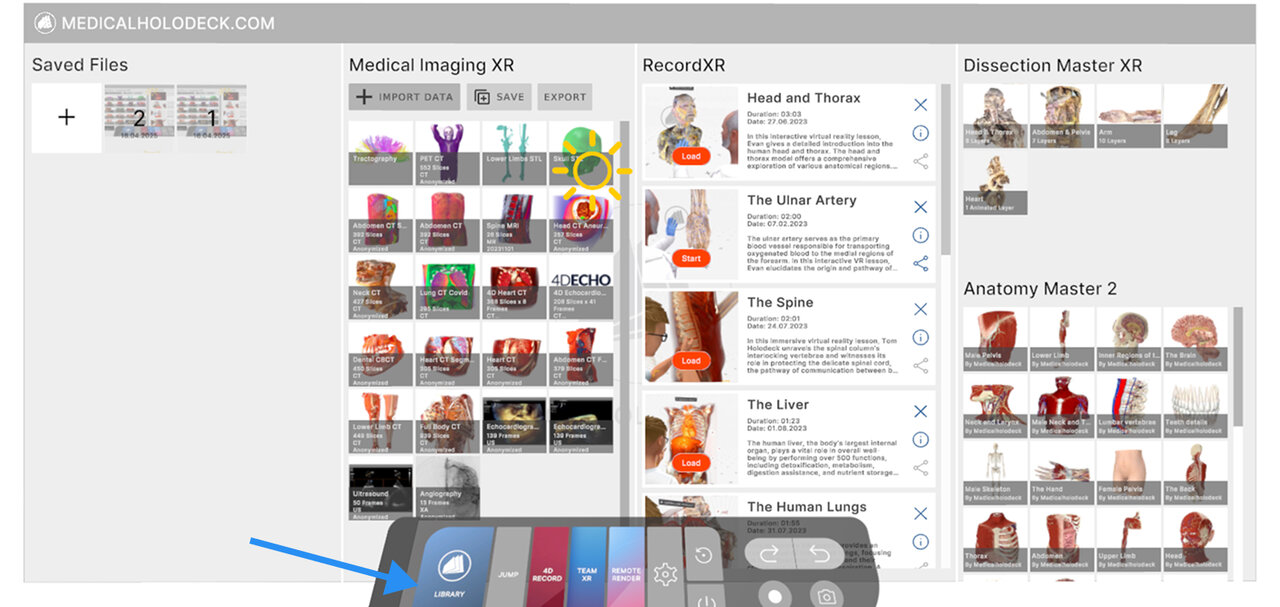
لاستيراد التسجيل الجديد الذي أنشأته في Medicalholodeck:
- افتح التطبيق وانتقل إلى لوحة المكتبة.
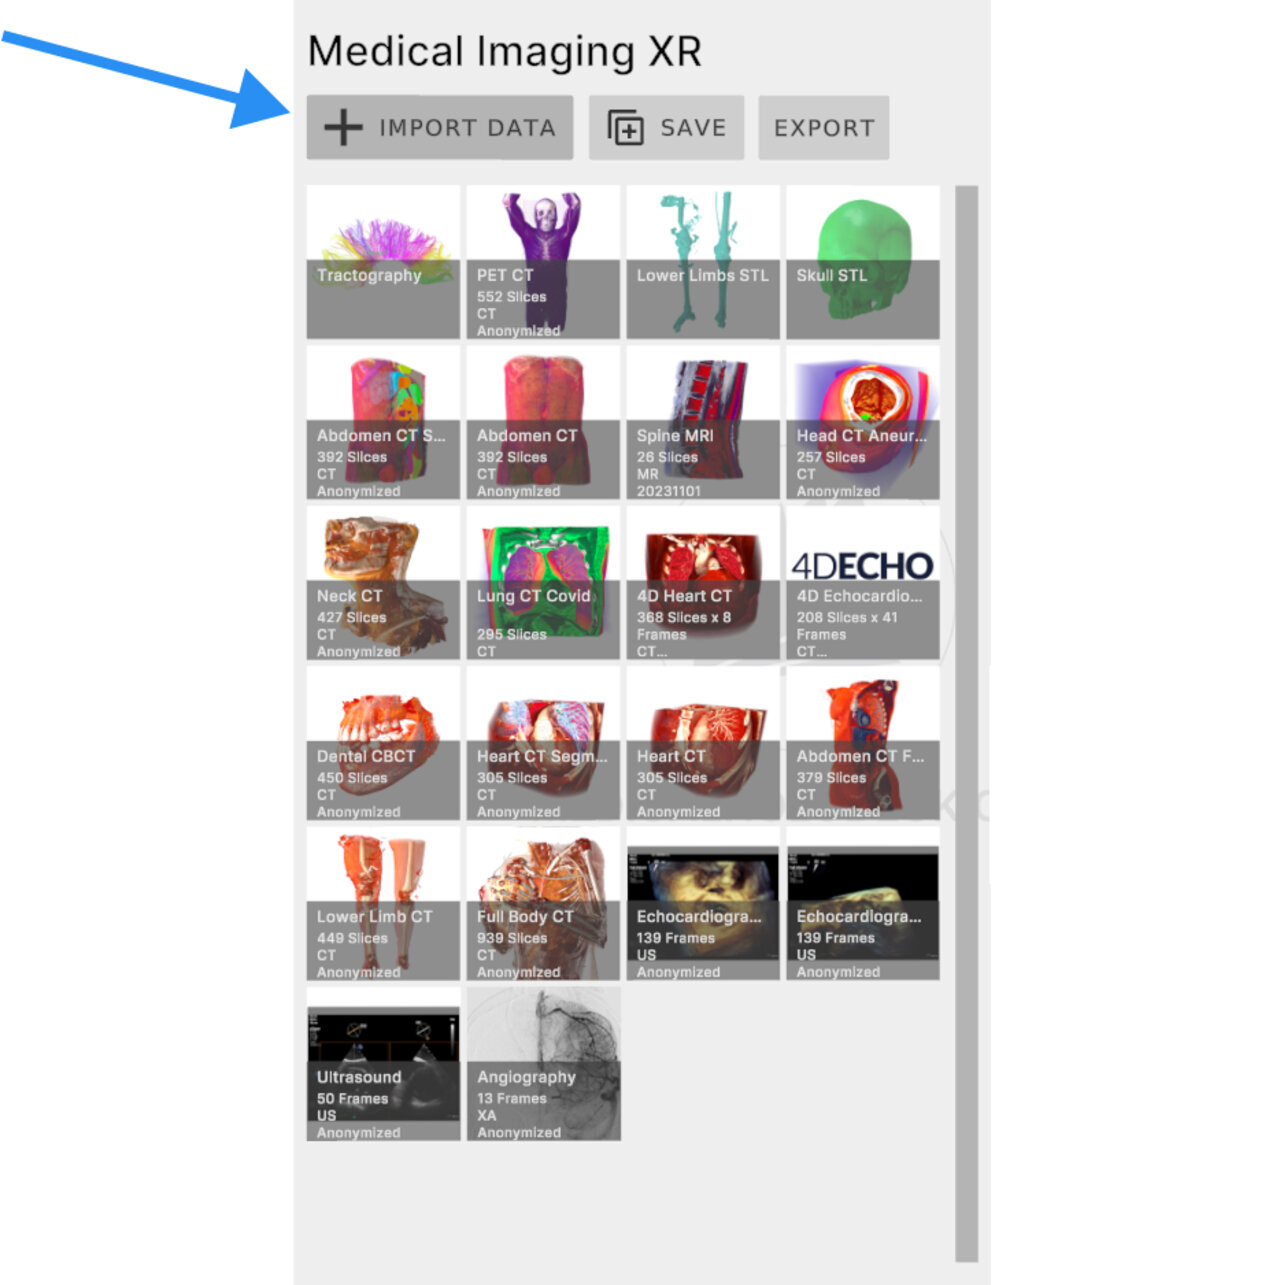
- حدد قسم Medical Imaging XR وانقر على زر استيراد البيانات.
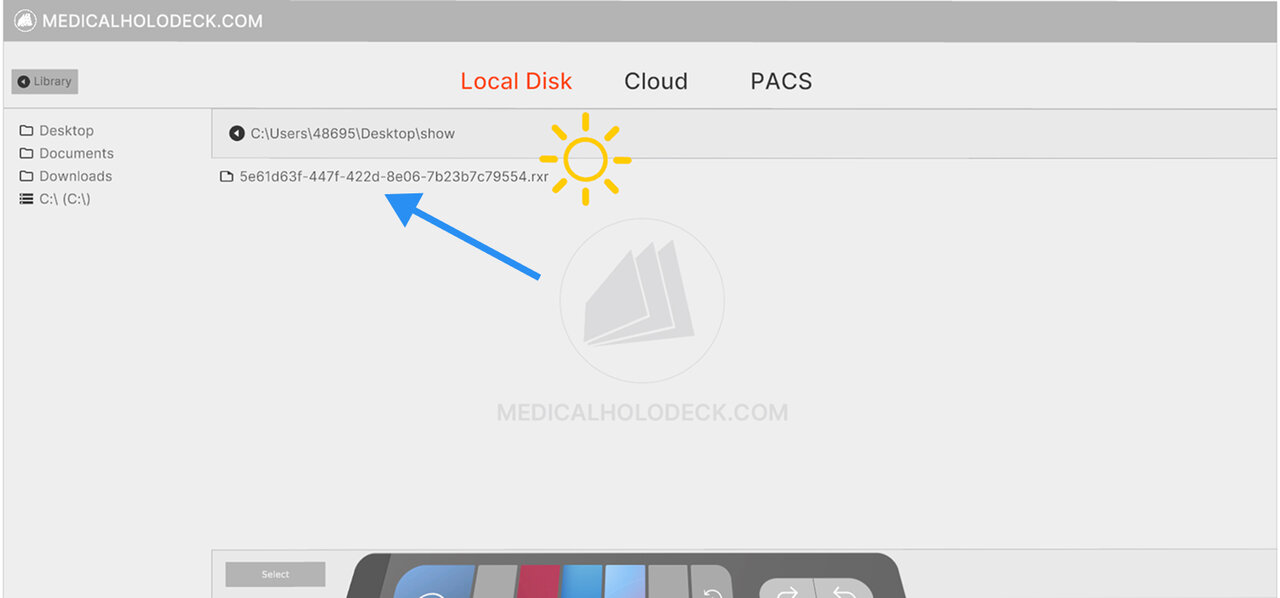
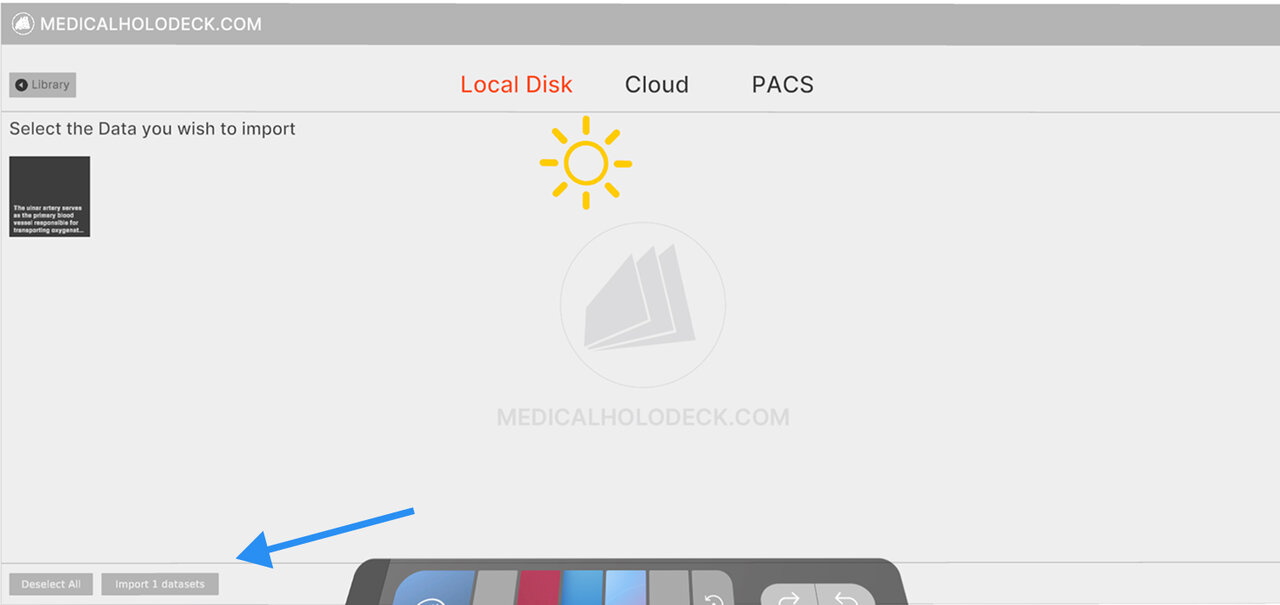
- ابحث عن ملف تسجيل .RXR الخاص بك وحدده من جهاز الكمبيوتر الخاص بك.
- قم بتأكيد الاستيراد. سيظهر التسجيل في الموضع العلوي تحت قسم RecordXR.