RecordXR Studio Manual
The RecordXR Studio User Interface consists of the editing tools, the
metadata section and the project controls.
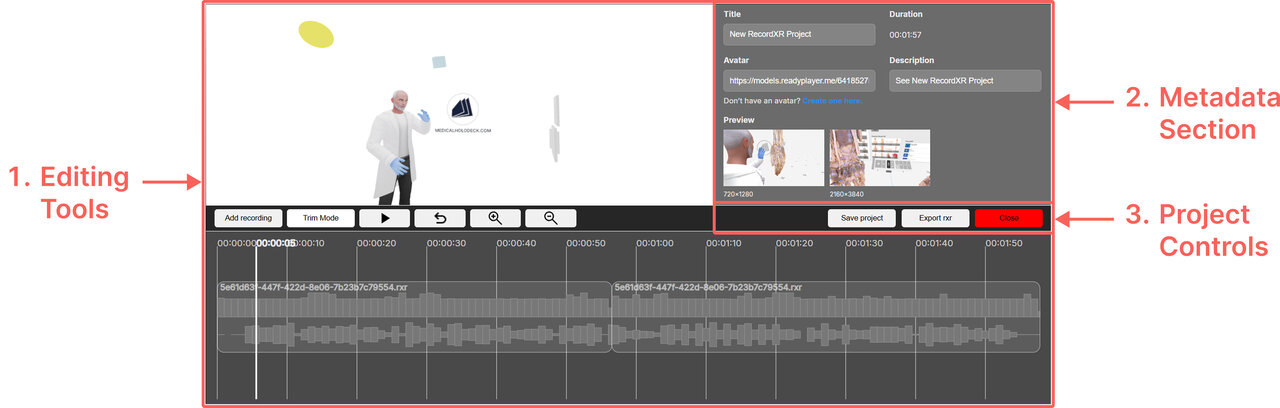 1. Editing tools
The editing tools section includes three main components: the preview
window, the timeline toolbar, and the timeline.
1. Editing tools
The editing tools section includes three main components: the preview
window, the timeline toolbar, and the timeline.

1. Editing tools
The editing tools section includes three main components: the preview
window, the timeline toolbar, and the timeline.
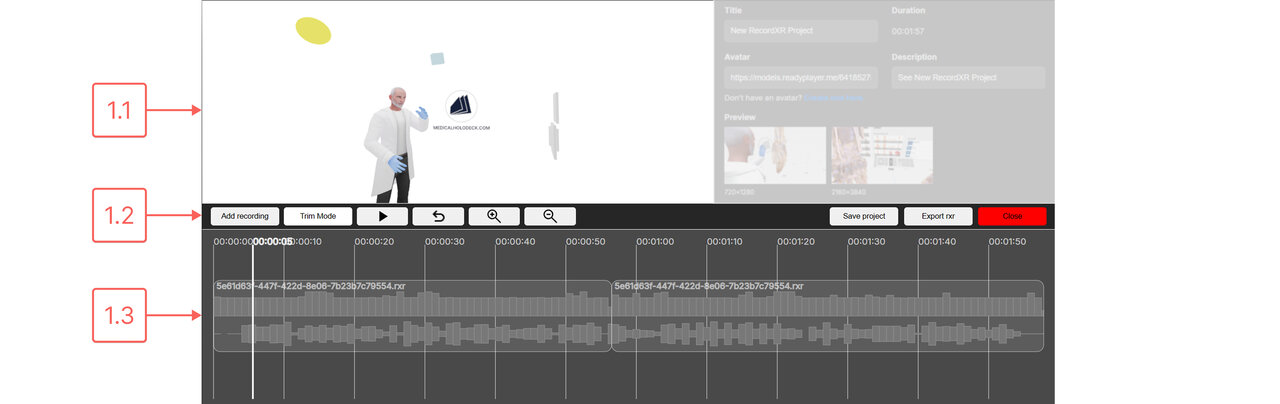
1.1
Preview window
This window allows previewing the recording along with the avatar. The view is zoomable and rotatable, offering a 360° perspective. 1.2 Timeline toolbar
This section contains all the essential action buttons for editing recordings.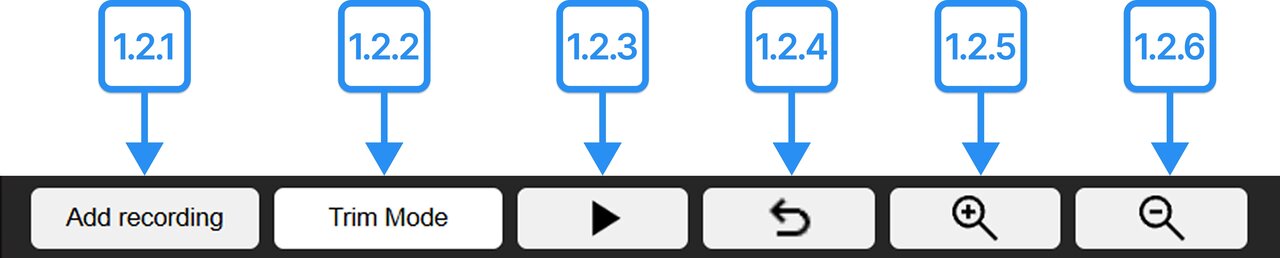
This is an editing interface that displays recordings along a horizontal time axis, where time progresses from left to right. Recordings can be rearranged by dragging and dropping them into the desired order.
A white vertical line, known as the playhead, indicates the current position in the timeline. The playhead can be moved to preview a specific moment in the recording or to begin viewing from that point.
Each recording is visually represented by two rows: the top row displays the movement of objects within the recording. The bottom row displays the associated audio.
To navigate through the timeline, use the keyboard arrow keys or the scroll bar located at the bottom of the page.
2. Metadata section
This section displays key project information and allows for its
configuration.
This window allows previewing the recording along with the avatar. The view is zoomable and rotatable, offering a 360° perspective. 1.2 Timeline toolbar
This section contains all the essential action buttons for editing recordings.
1.2.1 Add recording
Adds a recording file to the project. Newly added recordings appear at the end of the timeline. 1.2.2 Trim mode
This function enables removal of unwanted portions from the beginning and end of uploaded recordings. After pressing the trim mode, two additional buttons will appear.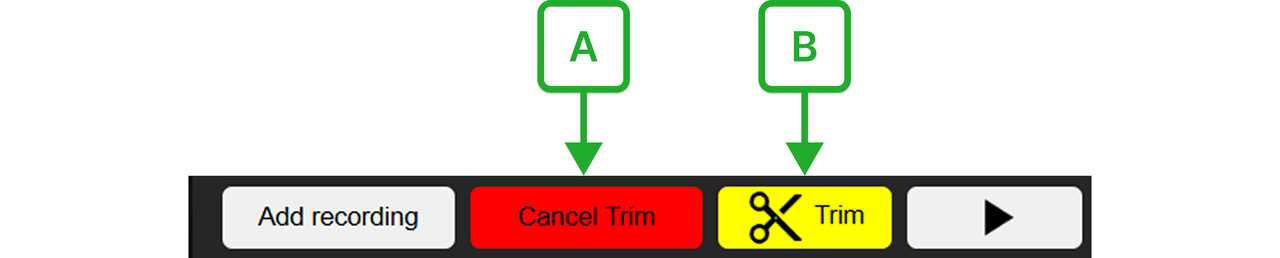
Starts or stops the preview of the recording. 1.2.4 Undo
Reverts the last change. If multiple edits have been made, they will be undone in reverse order. 1.2.5 Zoom in
Zooms in on the timeline to allow for more precise editing, such as trimming. 1.2.6 Zoom out
Zooms out of the timeline to provide a broader view of the recording.
1.3
Timeline
Adds a recording file to the project. Newly added recordings appear at the end of the timeline. 1.2.2 Trim mode
This function enables removal of unwanted portions from the beginning and end of uploaded recordings. After pressing the trim mode, two additional buttons will appear.
A Cancel trim
Exits trim mode without applying any changes. B Trim
To trim a recording, drag the red handles that appear at the beginning and end of each file to the desired positions. Once the selection is set, click the trim button to apply the changes.
1.2.3 Play/pause
Exits trim mode without applying any changes. B Trim
To trim a recording, drag the red handles that appear at the beginning and end of each file to the desired positions. Once the selection is set, click the trim button to apply the changes.
Starts or stops the preview of the recording. 1.2.4 Undo
Reverts the last change. If multiple edits have been made, they will be undone in reverse order. 1.2.5 Zoom in
Zooms in on the timeline to allow for more precise editing, such as trimming. 1.2.6 Zoom out
Zooms out of the timeline to provide a broader view of the recording.
This is an editing interface that displays recordings along a horizontal time axis, where time progresses from left to right. Recordings can be rearranged by dragging and dropping them into the desired order.
A white vertical line, known as the playhead, indicates the current position in the timeline. The playhead can be moved to preview a specific moment in the recording or to begin viewing from that point.
Each recording is visually represented by two rows: the top row displays the movement of objects within the recording. The bottom row displays the associated audio.
To navigate through the timeline, use the keyboard arrow keys or the scroll bar located at the bottom of the page.
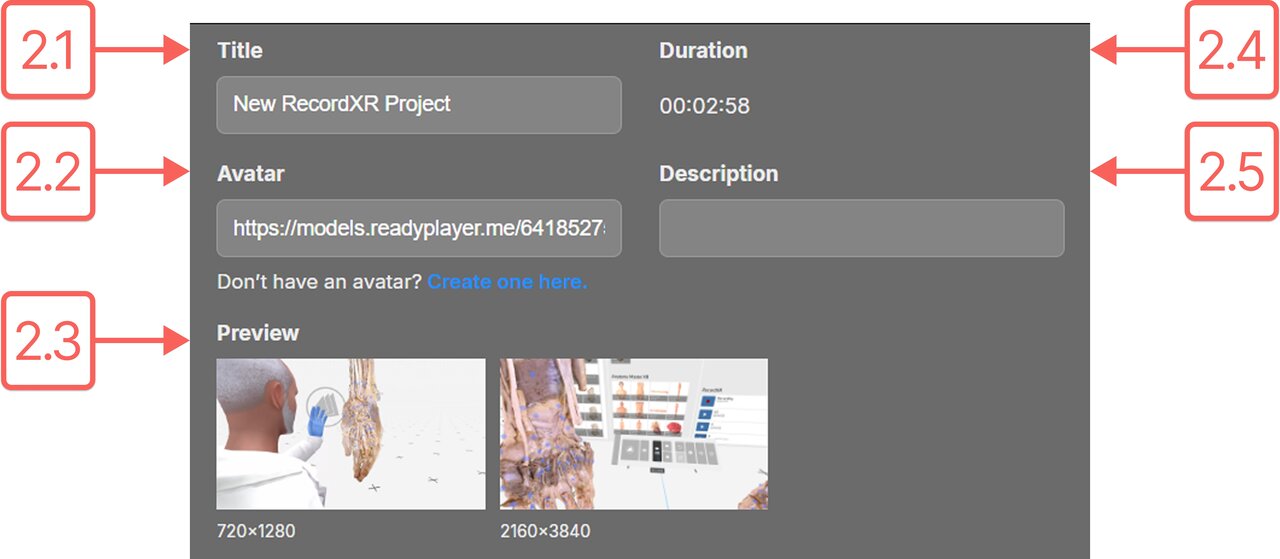
2.1
Title
Shows the name of the project. The title can be edited at any time. This name will appear in the Medicalholodeck library. 2.2 Avatar
A customized avatar can be added to the recording. To create one, visit https://readyplayer.me/avatar and design the avatar. Once ready, paste its URL in this field. 2.3 Preview icons
Allows preview visuals to be added to the recording displayed in the library. A smaller, square image appears in the library panel, while a larger, rectangular image is shown in the store. 2.4 Duration
Displays the total length of the created recording. 2.5 Description
Provides space for a brief description of the recording. This description will be visible in the library beneath the project title.
3. Project controls
This section provides options for managing your project.
Shows the name of the project. The title can be edited at any time. This name will appear in the Medicalholodeck library. 2.2 Avatar
A customized avatar can be added to the recording. To create one, visit https://readyplayer.me/avatar and design the avatar. Once ready, paste its URL in this field. 2.3 Preview icons
Allows preview visuals to be added to the recording displayed in the library. A smaller, square image appears in the library panel, while a larger, rectangular image is shown in the store. 2.4 Duration
Displays the total length of the created recording. 2.5 Description
Provides space for a brief description of the recording. This description will be visible in the library beneath the project title.
3.1
Save project
This button saves the current project to your computer as a .rxrproj file, which can be reopened later in RecordXR Studio. 3.2 Export RXR
Exports the completed recording as a .RXR file, allowing it to be displayed within the Medicalholodeck App. 3.3 Close
Closes RecordXR Studio. Save your project before closing.