5.1
Scaling
5.1.V1.9-01
Put both hands into a model until they are framed in blue. Hold both triggers and move your hands apart to scale.
5.2
Taking apart
5.2.V1.9-01
Point the laser at a part and pull the trigger to highlight it yellow. Pull the trigger again and move it aside while holding.
5.3
Moving
5.3.V1.9-01
5.4
Rotating
5.4.V1.9-01
Place one or both hands in the model until it’s framed in blue. Pull the trigger and rotate with your hand movement.
5.5
Cutting
5.5.V1.9-01
Press the left grip or select the cutter tool from the object pad. Move your hand into the model to see a live cut. Pull the trigger to fix the cut. To remove it, point your laser at the red X. Use the marker’s cut visibility button to show/hide cuts.
5.6
Annotations
5.6.V1.9-01
Point the laser at a part to view its annotation. Press the trigger to pin it. You can also change the part’s visibility here.
5.6.1
Visibility button
Switches the visibility of the selected part.
5.6.2
Transparency button
Makes the selected part transparent.
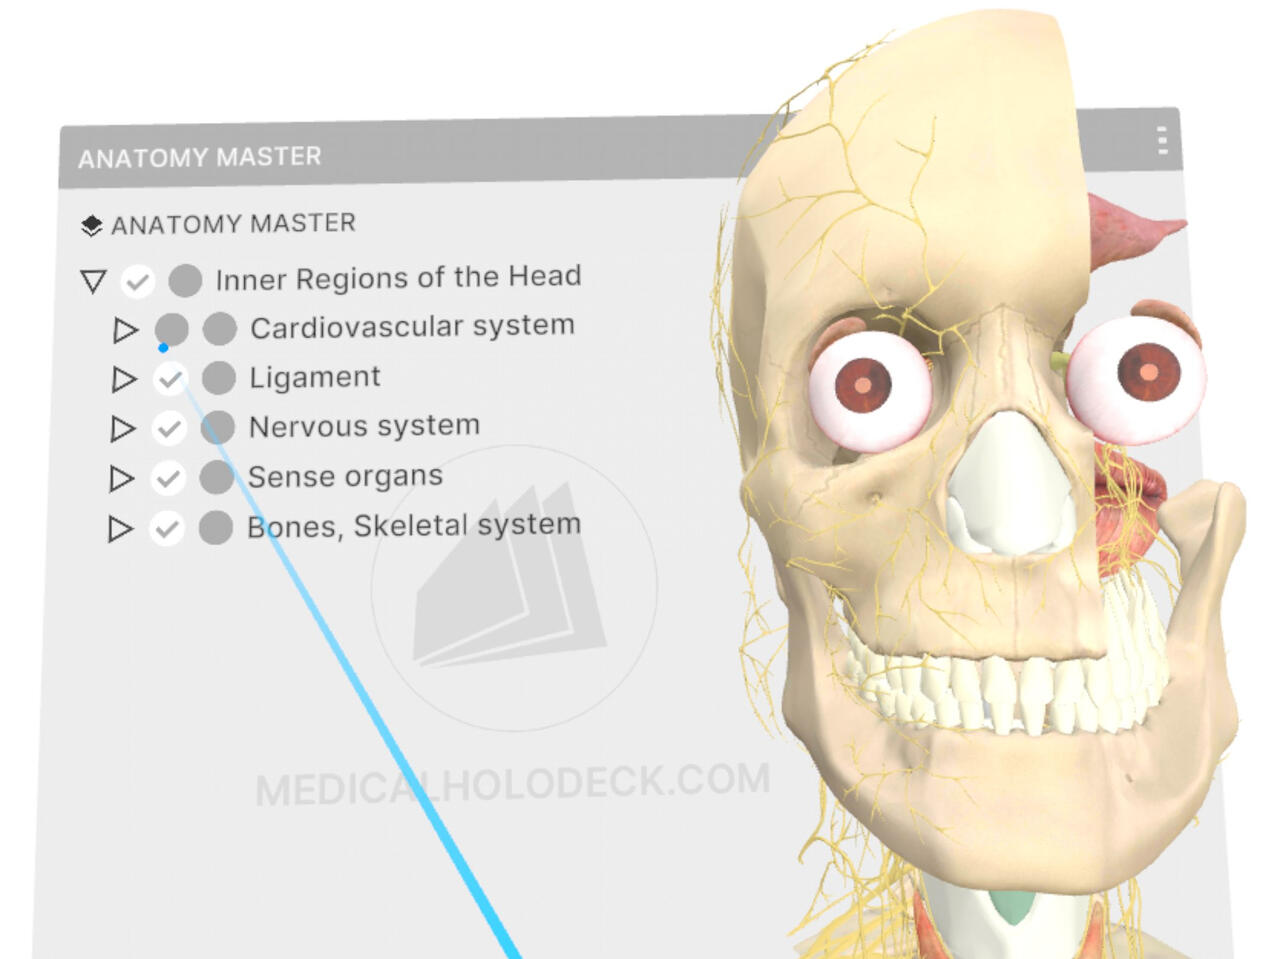
5.7
Visibility controls
5.7.V1.9-01
This section shows, hides, or makes the parts of the model transparent.
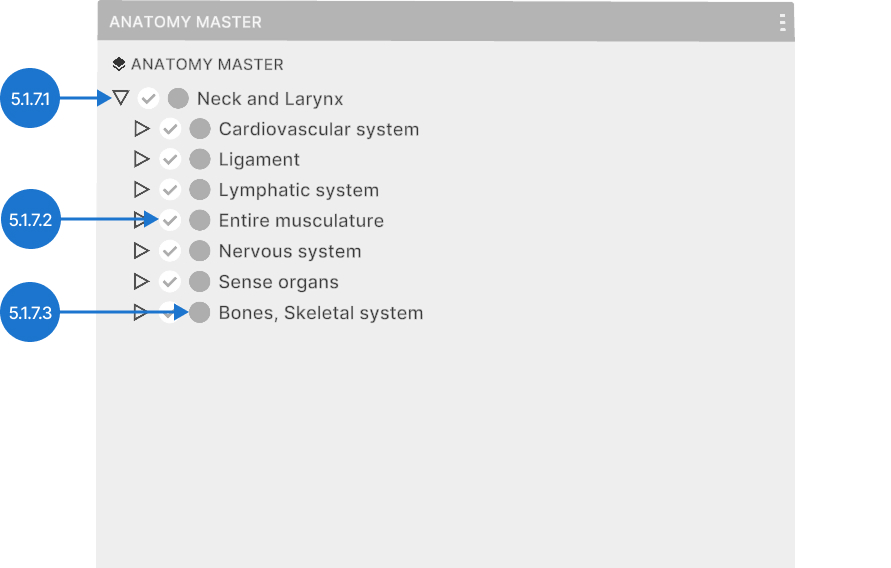
5.7.1
Arrow
Expands or collapses the section.
5.7.2
Visibility button
Switches the visibility of the selected part.
5.7.3
Transparency button
Makes the selected part transparent.
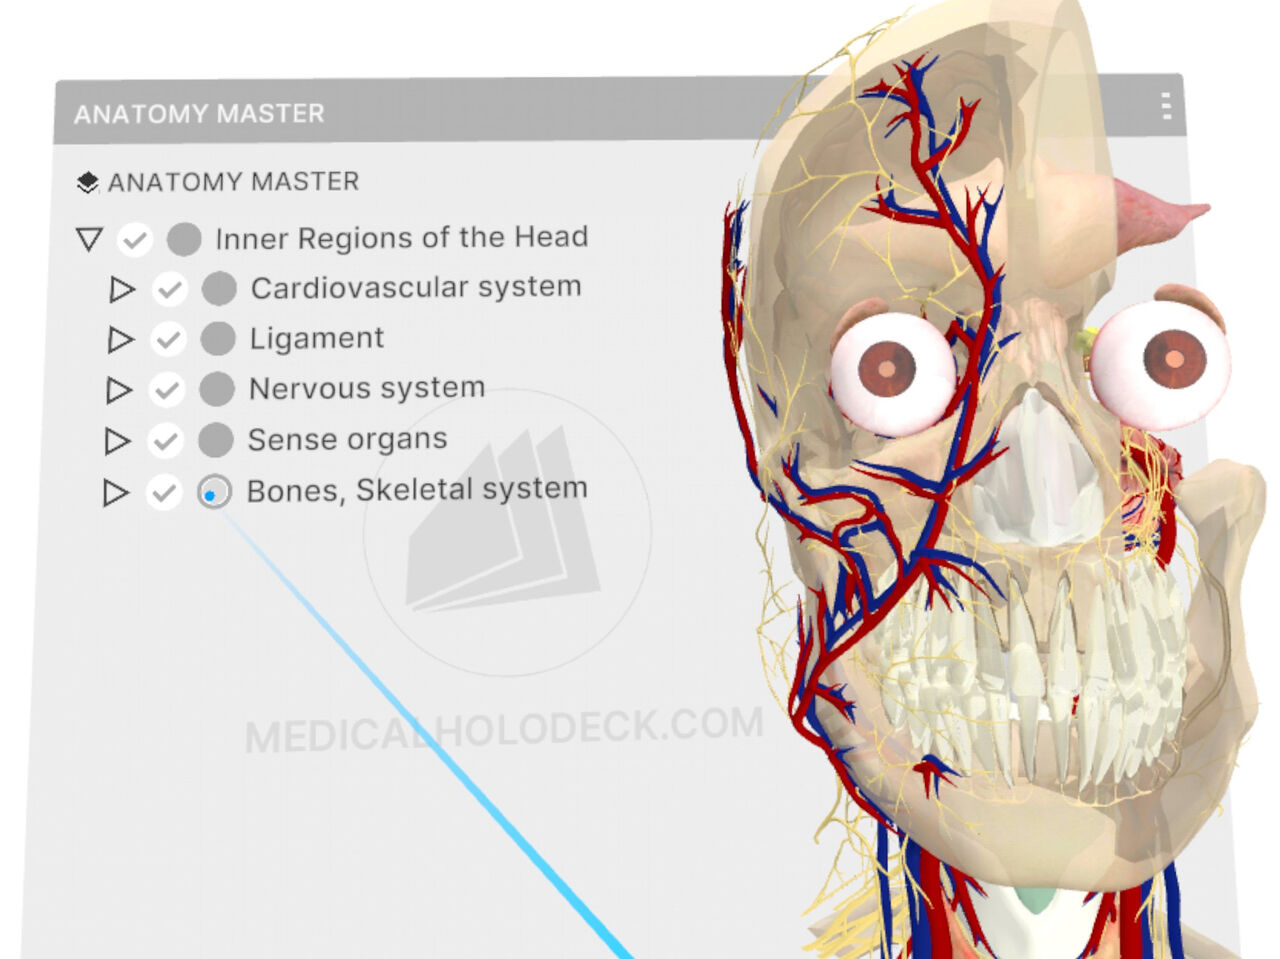
With multiple models loaded, point the laser at one to access its visibility controls. To move visibility controls, grab the top bar with the trigger. Drag to a new spot and release.