1.2 Object pad
1.2.V1.9-01
Provides tools for manipulating, measuring, and annotating datasets. It appears when a dataset is loaded from the library.
The Object Pad is the main toolkit for interacting with datasets. It appears automatically when a dataset is loaded from the library.
The Cutter enables precise slicing through datasets. Select it from the pad using the right trigger. The cutting tool will activate on your left controller. Press the trigger again to switch it to the right. To preview a cut, move your hand into the dataset. Pull the trigger to finalize the slice. To remove a cut, click the red X icon.
Use the Laser tool to interact with user interface elements. Select it by clicking the corresponding button on the pad.
Masking is used to selectively control the visibility of specific regions within a dataset. When the tool is activated, a red ball appears at your controller's fingertip, allowing you to 'paint' in 3D space. Pressing the mask button opens an additional panel.
Use the slider to adjust the diameter of the red ball. Switch between three masking modes. Isolate keeps only the selected area visible, Hide makes it invisible, and Highlight visually emphasizes selected areas. To remove masking, select the Eraser tool. Point at the affected area and hold the trigger. Mask Channels allow you to control multiple masked areas within your dataset. Switch channels to apply and manage independent masking effects. At the bottom of the panel, the volume of the currently masked area is displayed.
To measure surface area, select the Area Measuring tool from the Object Pad. A black cone will appear at the controller’s fingertip. While in the Area Connecting mode, use the additional panel to switch between area types.
In the Circular mode use the trigger to place the centre point. Each new point will connect to both the centre and the previously placed point, forming a shape around the centre. Select one of the points to close the shape. The surface area will be displayed in square millimetres. The new shape can be adjusted. Aim at a point and hold the trigger to reposition it.
In the Continuous mode, there is no fixed anchor point. Each new point connects to the two most recently placed points.
To measure cylindrical shapes, switch to the Cylinder Connecting mode. First set the diameter of the base, then the height of the figure.
To measure linear distance, select the Distance Measuring tool. Set the start and end points with the trigger.
Select the Delete tool to remove objects such as measurements, shapes, or drawings from the workspace. A red X will appear at the controller’s tip. Aim at the object and press the trigger to delete it.
To resize a dataset, aim at the Scale button. Then, move your controller up or down while holding the trigger to adjust the size.
To reposition a dataset, aim at the Move button and hold the trigger. Move your hand to place the dataset in a desired location.
Aim at the Move Backward button, hold the trigger and move your controller up or down to change the dataset’s distance from you.
The number in the top-right corner of the pad shows the current frame rate, helping you monitor how smoothly the app is running.
To remove a dataset from the workspace, press the Delete button.
The Lighting button toggles the lighting on your dataset. In Medical Imaging XR, this function is only available in the PC-VR mode.
To measure an angle in 3D space, start by selecting the angle measuring tool from the pad. Then press the trigger to set the vertex and place the two arms of the angle by setting each endpoint. The angle will appear in degrees as soon as both lines are placed.
Choose the Drawing tool, hold the trigger and move your controller to draw in the workspace. Use the Stroke Width slider to adjust the thickness of your lines. Pick a colour from the extra panel and press the trigger to apply it to your drawing.
To place a visual marker, select the Marker tool. A coloured arrow will appear at your controller’s fingertip. Move it into place and press the trigger to drop the marker.
To rotate the dataset, aim at the Rotate Horizontally or Rotate Vertically button. Hold the trigger and move your controller left and right for horizontal rotation, or up and down for vertical.
Reposition the object pad by aiming at its handle, holding the trigger and dragging it to a desired location.

1.2.1
Cutter
1.2.1.V1.9-01
Enables precise cuts through the datasets. Select it with the right trigger to activate the cutter on your left controller; press again to switch it to the right. Move your hand into the model to see a live cut. Pull the trigger to fix the cut. To remove it, point your laser at the red X. Use the marker’s cut visibility button to show/hide cuts.
1.2.2
Laser
1.2.2.V1.9-01
Turns on the laser on your right controller. Use the laser to point at interface elements, and press the trigger to select or activate them.
1.2.3
Masking
1.2.3.V1.9-01
Lets you focus on specific regions of a DICOM dataset by modifying their visibility. Use your controller like a brush to 'paint' areas in the 3D image - depending on the selected mode, the marked region will be hidden, isolated, or highlighted. Pressing the mask button with the trigger opens an additional panel and displays a red ball at your controller’s fingertip. Masking requires a lot of rendering power so it is recommended for PC-VR setup.
1.2.3.1
Mask size
Adjusts the red ball’s size. Use the slider to set the desired width.
1.2.3.2
Mask mode
Allows switching between different masking modes.
- Allows switching between different masking modes.
- Isolate: keeps only the selected area visible
- Hide: hides the selected area
1.2.3.3
Erase
Restores masked areas. Point at the region, hold the trigger to unmask, then release.
1.2.3.4
Mask channel
Let you organize and separate different masked areas within your DICOM dataset. Switch channels to apply and manage varied masking effects.
1.2.3.5
Mask volume
Shows the volume of the masked area on the selected channel.

1.2.4
Measure area
1.2.4.V1.9-01
Enables area measurement. Press it with the trigger and a black cone will appear at your controller’s fingertip. Place the points to define the shape and when finished the surface area will be displayed in square millimeters (mm²). All shapes can be adjusted. Aim at a point and hold the trigger to replace it. You can choose between two connection modes: area and cylinder.
1.2.4.1
Area mode
This mode calculates the surface area based on your selected points. You can choose between two sub-modes.
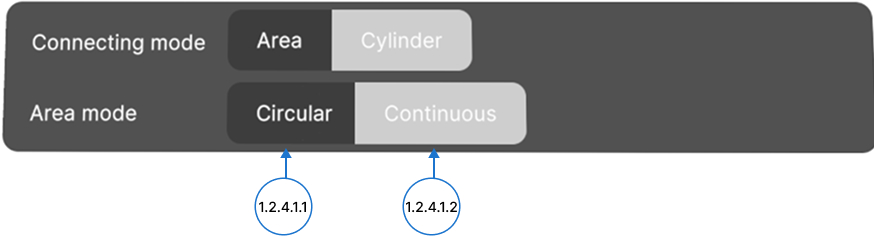
1.2.4.1.1
Circular mode
The first point you place defines the center of a circle. All points added after that define the circumference of the circle. These points are used to calculate the surface area. To close the shape, move the cone near any point and press the trigger when the “click to close the shape” prompt appears.
1.2.4.1.2
Continuous mode
After placing two first points, each new point you add connects with the previous two points to form a triangle. The total surface area is calculated by summing the areas of all the resulting triangles. To close the shape, move the cone near any point and press the trigger when the “click to close the shape” prompt appears.
1.2.4.2
Cylinder mode
In this mode the diameter and height of a cylinder are calculated based on three points. The first two points define the base circle of the cylinder, while the third point determines its height by measuring the distance from the base plane. After placing the third point, diameter and height will be calculated.

1.2.5
Measure distance
1.2.5.V1.9-01
Allows distance measurement. Press it with the trigger and a black cone will appear at your controller’s fingertip. Press the trigger to set the start point, move to the endpoint, and press again to display the distance in millimeters.
1.2.6
Delete
1.2.6.V1.9-01
Removes objects like measurements, shapes, or drawings from the workspace. A red X will appear on your controller - aim at the object and press the trigger to delete it.
1.2.7
Scale
1.2.7.V1.9-01
Resizes the active dataset. Press it with the trigger to enter scaling mode. Move the controller up or down while holding the trigger to adjust the size, then release the trigger to set it.
1.2.8
Move
1.2.8.V1.9-01
Repositions the active dataset. Aim at the button, hold the trigger and use your hand movement to move the dataset. Release to place it.
1.2.9
Move backward
1.2.9.V1.9-01
Adjusts the dataset’s distance. Aim at the button, hold the trigger and move the controller up or down to bring it closer or farther while holding the trigger. Release to set the position.
1.2.10
Frame rate
1.2.10.V1.9-01
Displays performance in FPS, helping you monitor app smoothness.
1.2.11
Remove dataset
1.2.11.V1.9-01
Deletes the active dataset. Press this button with the trigger to remove the dataset from the workspace.
1.2.12
Light on/off
1.2.12.V1.9-01
Controls dataset lighting. Press the trigger to toggle the light on or off. In Medical Imaging XR, lighting is available only in PC-VR mode due to performance limitations.
1.2.13
Measure angle
1.2.13.V1.9-01
Measures angles in VR. Press the trigger to set the angle’s vertex, then define the two line endpoints. The angle in degrees appears instantly once both lines are placed.
1.2.14
Draw
1.2.14.V1.9-01
Enables drawing. Aim your laser at the button, press the trigger, and move your controller to draw lines. An additional panel will appear. Release the trigger to stop drawing.
1.2.14.1
Stroke width
Use the stroke width slider to adjust the line thickness. Aim your laser, pull the trigger, and adjust the size to your preference.
1.2.14.2
Color
Select your desired color and press the trigger to apply it.

1.2.15
Marker
1.2.15.V1.9-01
Places visual markers in the workspace. Aim your laser at the button, press the trigger, and a colored arrow will appear at your controller’s fingertip. Move it to the desired location and press the trigger to place the marker.
1.2.16
Rotate horizontally
1.2.16.V1.9-01
Rotates the active dataset horizontally. Hold the trigger while moving the controller left to right, then release to set the angle.
1.2.17
Rotate vertically
1.2.17.V1.9-01
Rotates the active dataset vertically. Hold the trigger and move the controller up and down, then release to set the angle.
1.2.18
Handle
1.2.18.V1.9-01
Repositions the panel. Select it with trigger and release to set it to a new position.