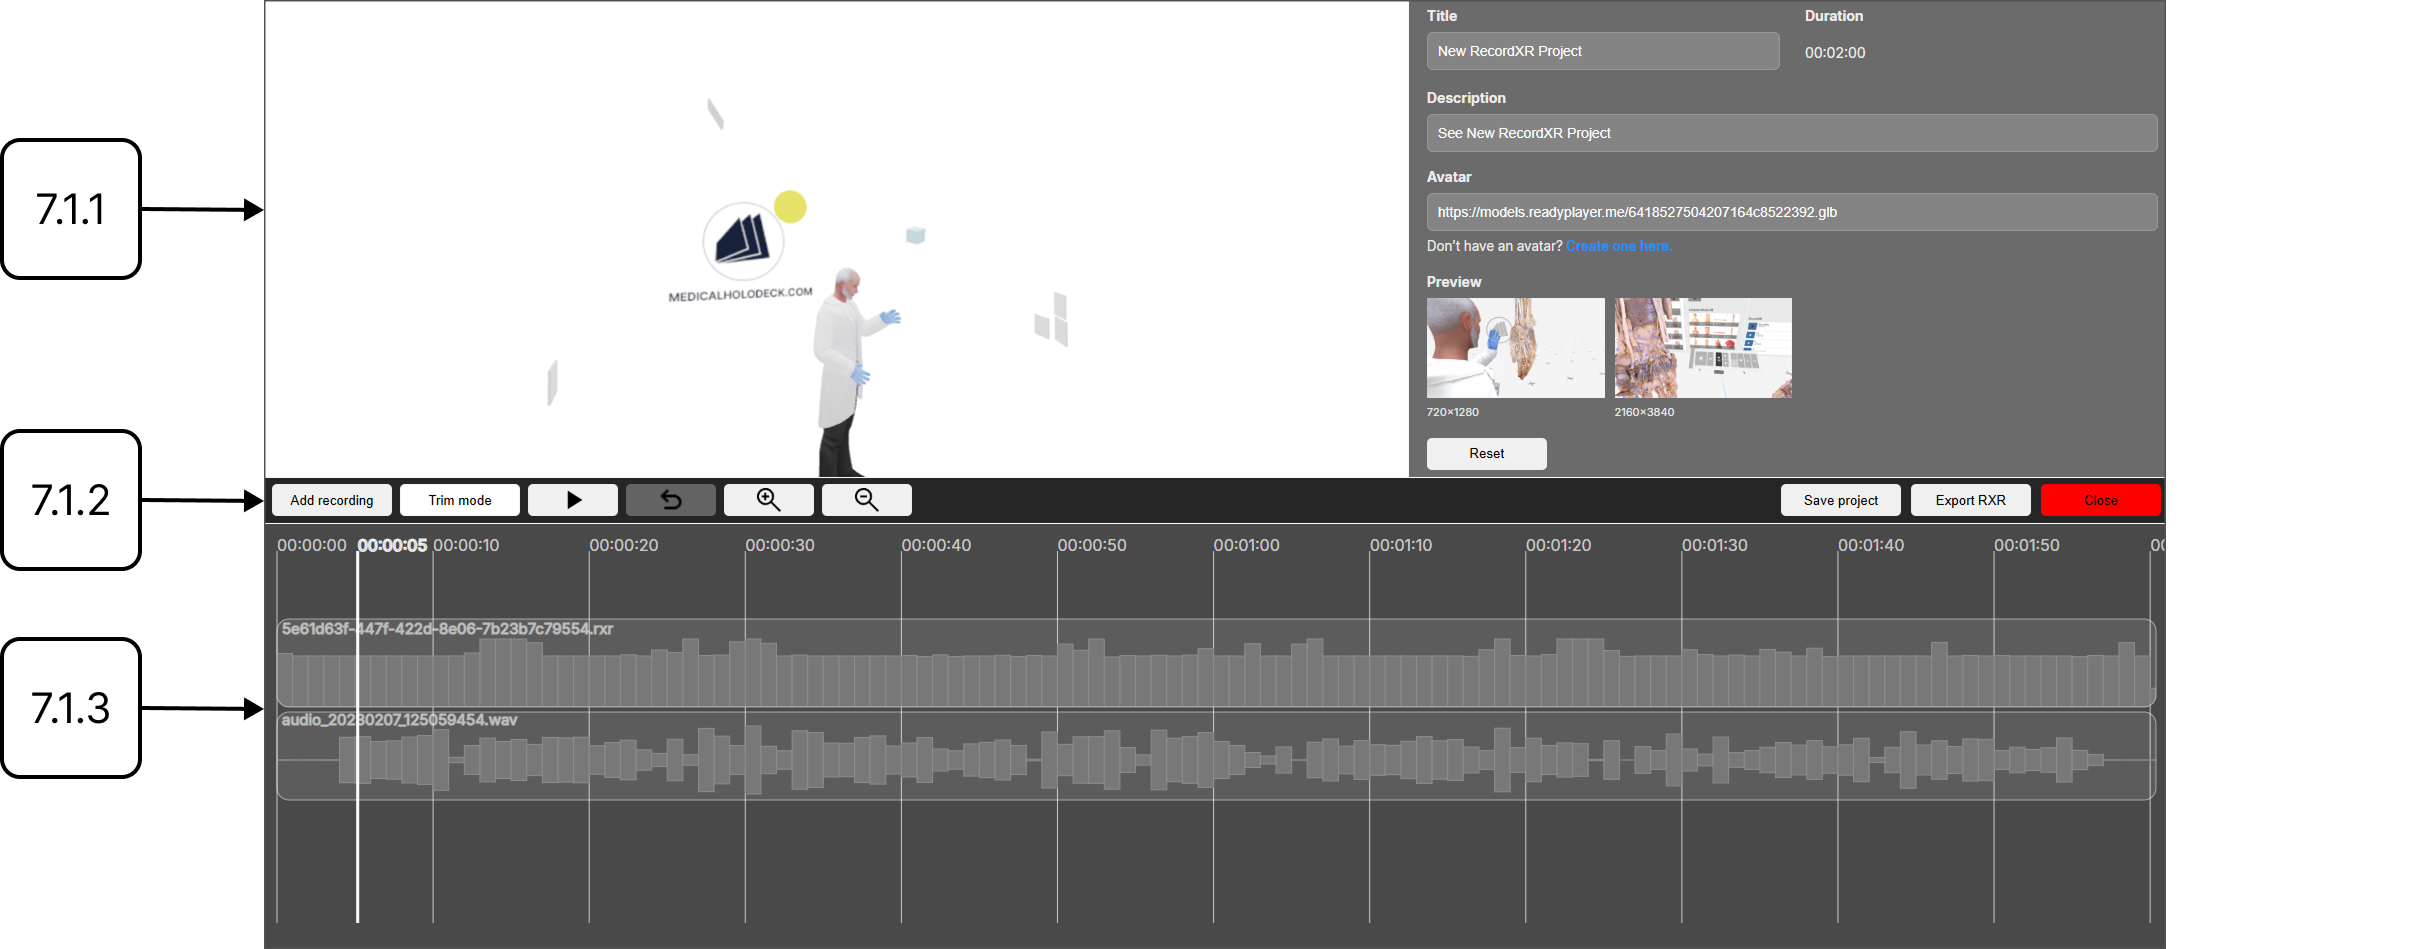
7.1 Editing tools
7.1.V1.9-01
The editing tools section includes three main components: the preview window, the timeline toolbar, and the timeline.
7.1.1
Preview window
7.1.1.V1.9-01
This window allows previewing the recording along with the avatar. The view is zoomable and rotatable, offering a 360° perspective.
7.1.2
Timeline toolbar
7.1.2.V1.9-01
This section contains all the essential action buttons for editing recordings.

7.1.2.1
Add recording
Adds a recording file to the project. Newly added recordings appear at the end of the timeline.
7.1.2.2
Trim mode
This function enables removal of unwanted portions from the beginning and end of uploaded recordings. After pressing the trim mode, two additional buttons will appear.

7.1.2.2.1
Cancel trim
Exits trim mode without applying any changes.
7.1.2.2.2
Trim
To trim a recording, drag the red handles that appear at the beginning and end of each file to the desired positions. Once the selection is set, click the trim button to apply the changes.
7.1.2.3
Play/pause
Starts or stops the preview of the recording.
7.1.2.4
Undo
Reverts the last change. If multiple edits have been made, they will be undone in reverse order.
7.1.2.5
Zoom in
Zooms in on the timeline to allow for more precise editing, such as trimming.
7.1.2.6
Zoom out
Zooms out of the timeline to provide a broader view of the recording.
7.1.3
Timeline
7.1.3.V1.9-01
The Timeline displays your recordings along a horizontal time axis, where time progresses from left to right. To navigate through the timeline, use the keyboard arrow keys or the scroll bar located at the bottom of the page. You can rearrange recordings by simply dragging and dropping them into the desired order.
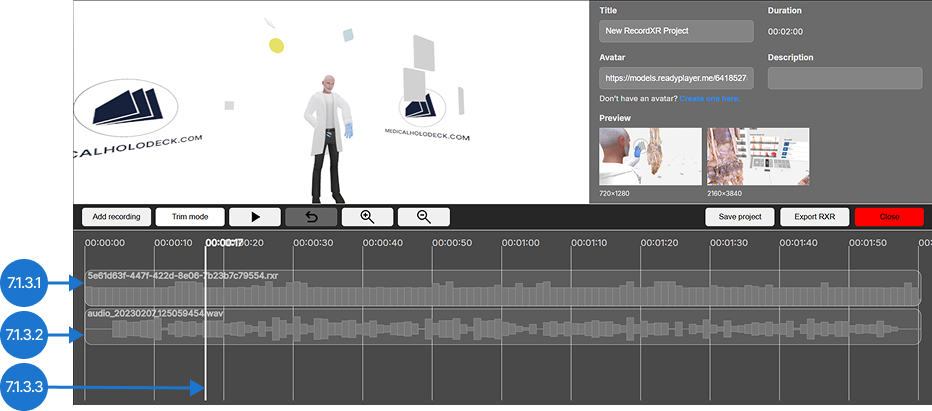
7.1.3.1
Video track
Contains the visual recording of your session.
7.1.3.2
Audio track
Displays the audio track.
7.1.3.3
Playhead
Indicates the current position in the timeline. The playhead can be moved to preview a specific moment in the recording.
7.1.3.4
Audio editing options
Click on the desired audio track to show audio editing functions.
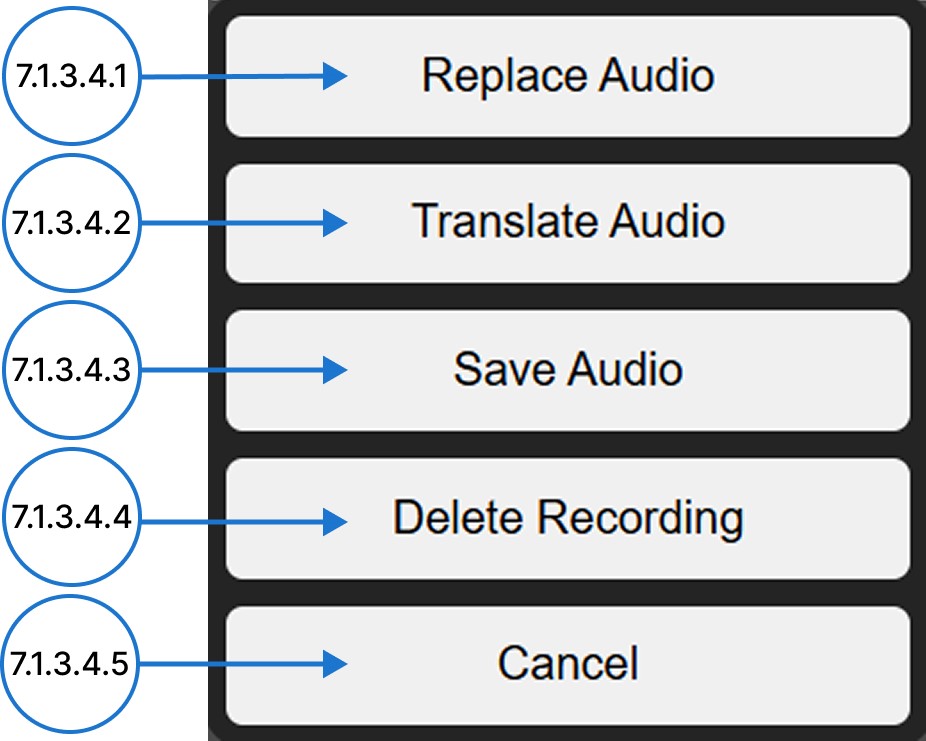
7.1.3.4.1
Replace audio
Replaces the track's audio with a new file from your computer. A file browser will open, allowing you to select the replacement file.
7.1.3.4.2
Translate audio
Opens a dialog window that allows you to translate the selected audio track into other languages.

Enter your Eleven Labs API key if you have an account or create one on elevenlabs.io page and press continue. Choose the target language and confirm the translation.
7.1.3.4.3
Save audio
Saves the audio file in MP4 format on the computer.
7.1.3.4.4
Delete recording
Deletes the selected .rxr file from the app.
7.1.3.4.5
Cancel
Closes the audio editing window without making any changes.