Medicalholodeck manual
Quick start tutorials
Support and feedback: support@medicalholodeck.com
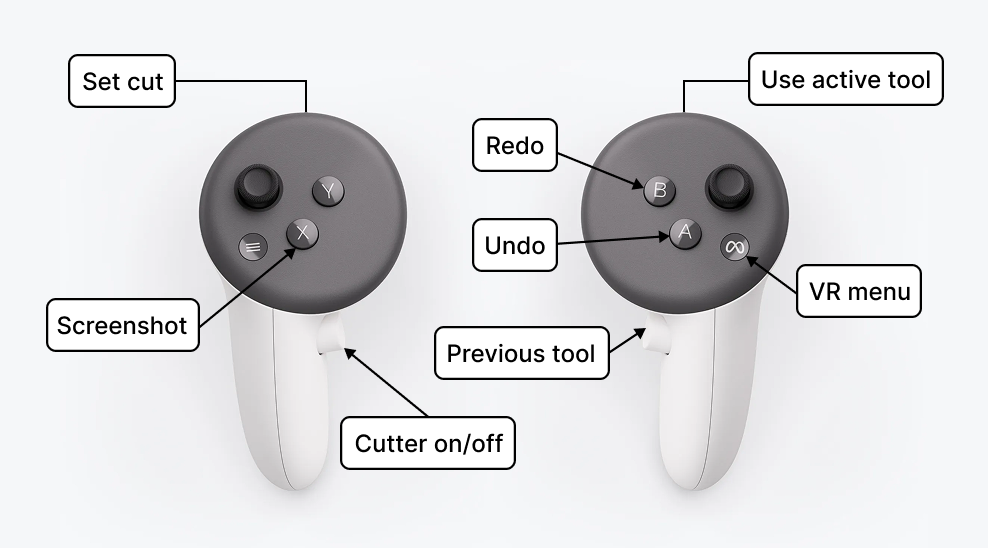
VR Controllers
Activating license keys on standalone
Activating license keys on PC-VR systems
Hand navigation
Create screenshots and videos
Connect to Link