8.1 Creating a team
8.1.V1.9-01
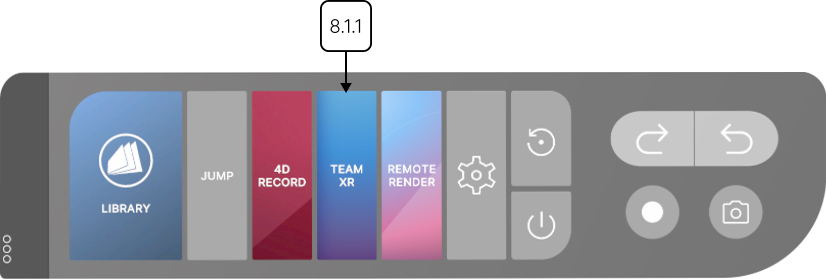
8.1.1
Click the TeamXR button with the trigger on the main control pad in Medicalholodeck.
8.1.1.V1.9-01
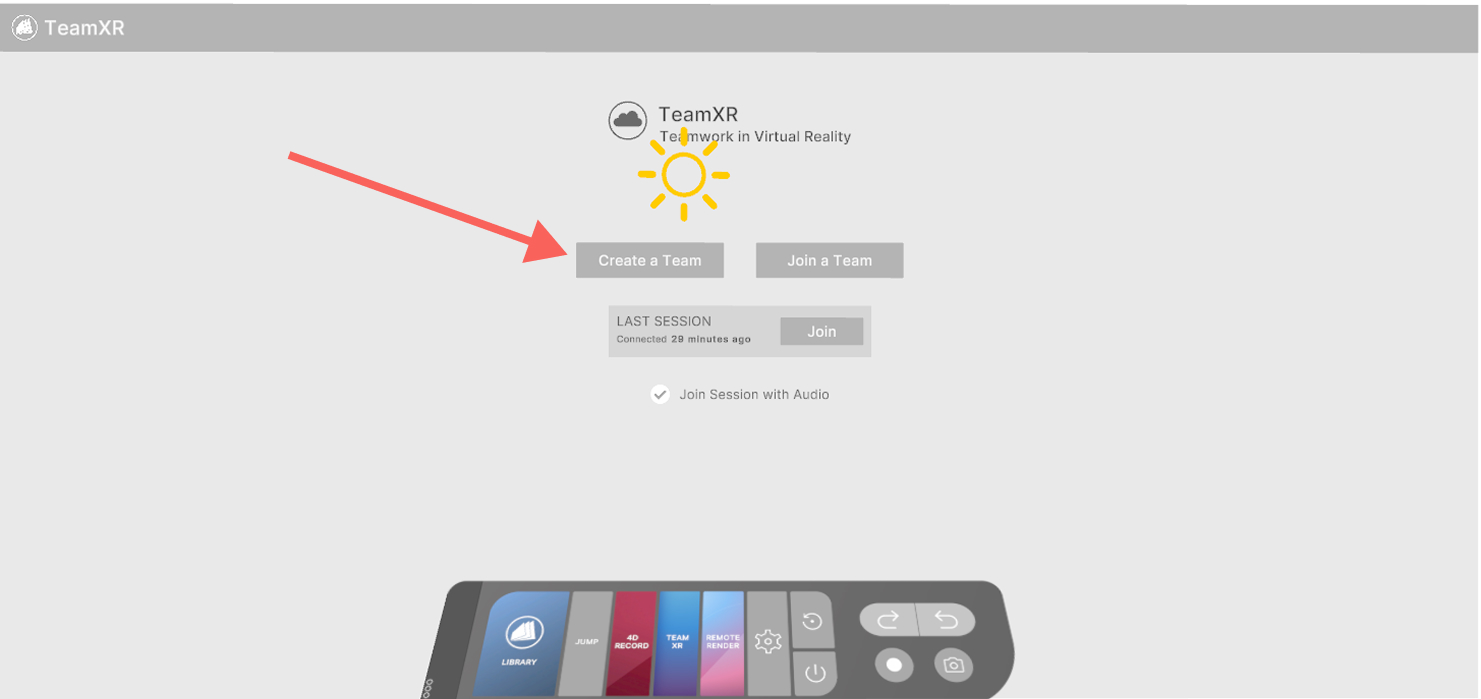
8.1.2
Press the create a team button with the trigger.
8.1.2.V1.9-01
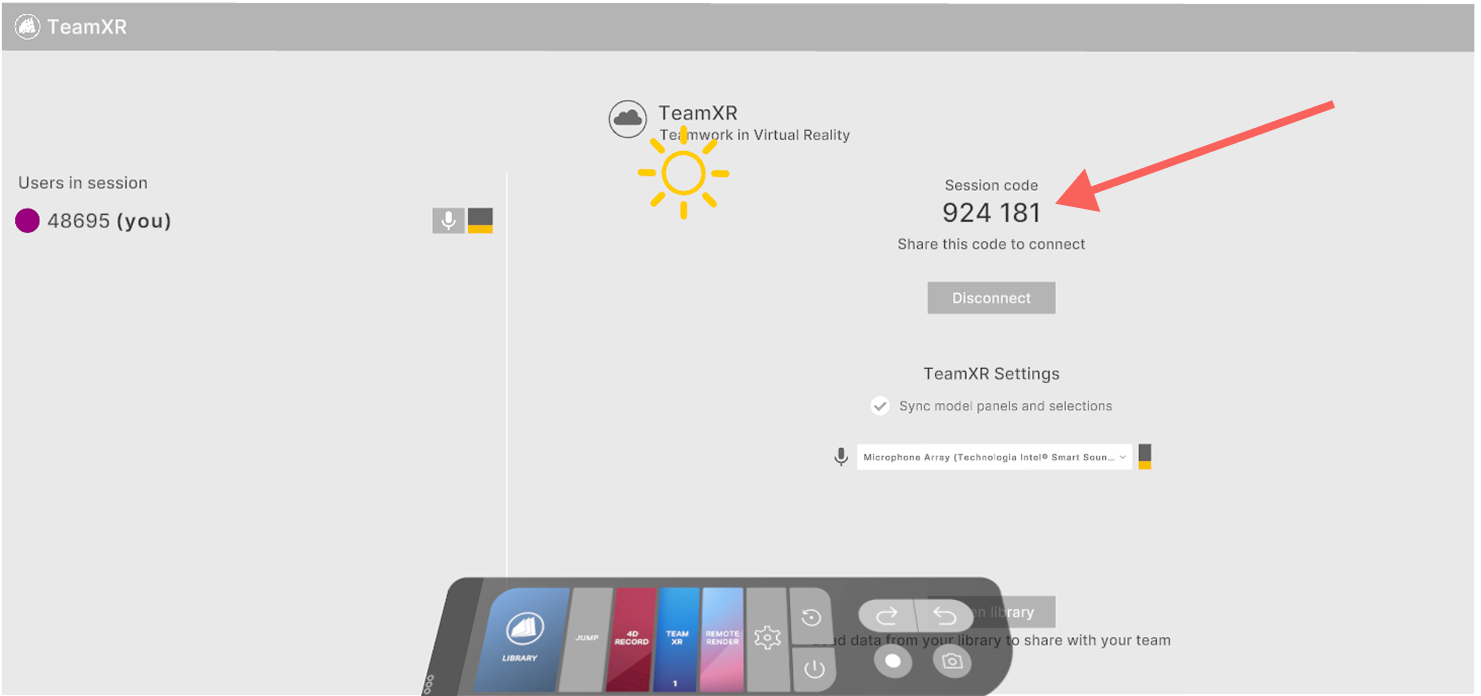
8.1.3
Share 6-digit code with your team members.
8.1.3.V1.9-01