7. RecordXR Studio
7.V1.9-01
RecordXR Studio is a VR editing tool that lets users cut, shorten, and combine 4D recordings created with RecordXR. It allows you to edit and synchronize audio, add avatars for more engaging virtual interactions, and create multilingual versions by layering audio tracks in different languages.
Learn how to edit your Medicalholodeck RXR recordings using RecordXR Studio.
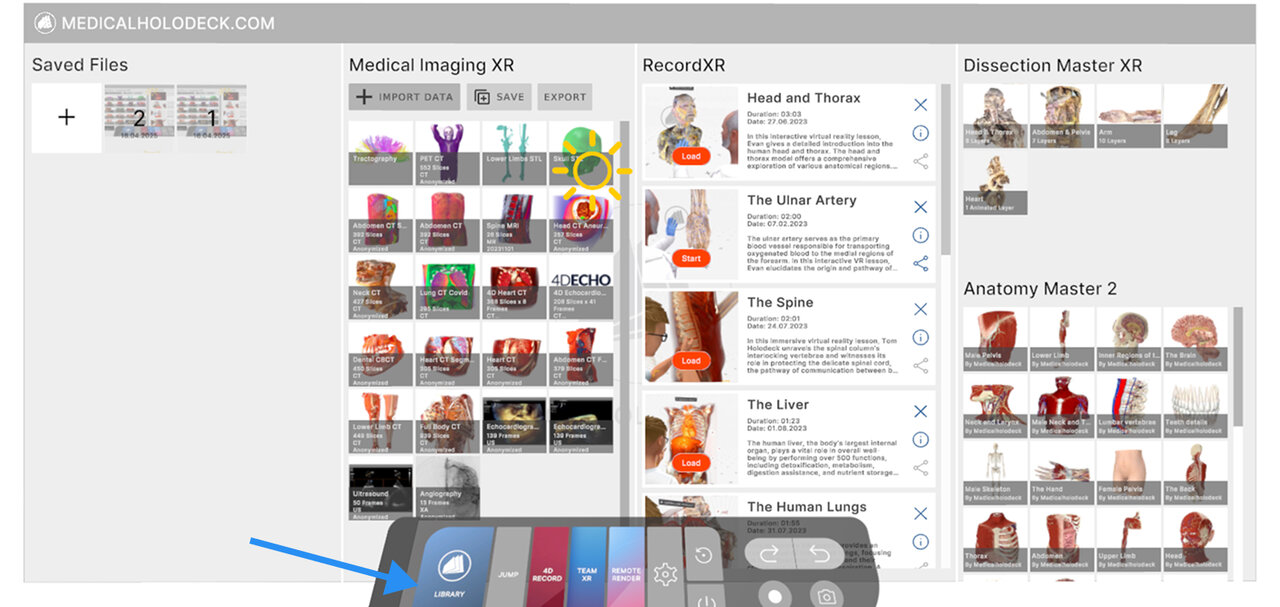
Go to the RecordXR section in the library and select the recording you want to edit.
If you are using a standalone headset, you need to connect it to your computer and manually transfer the file.
On PC-VR the recording will be saved automatically as an RXR file on your desktop after pressing the export button.
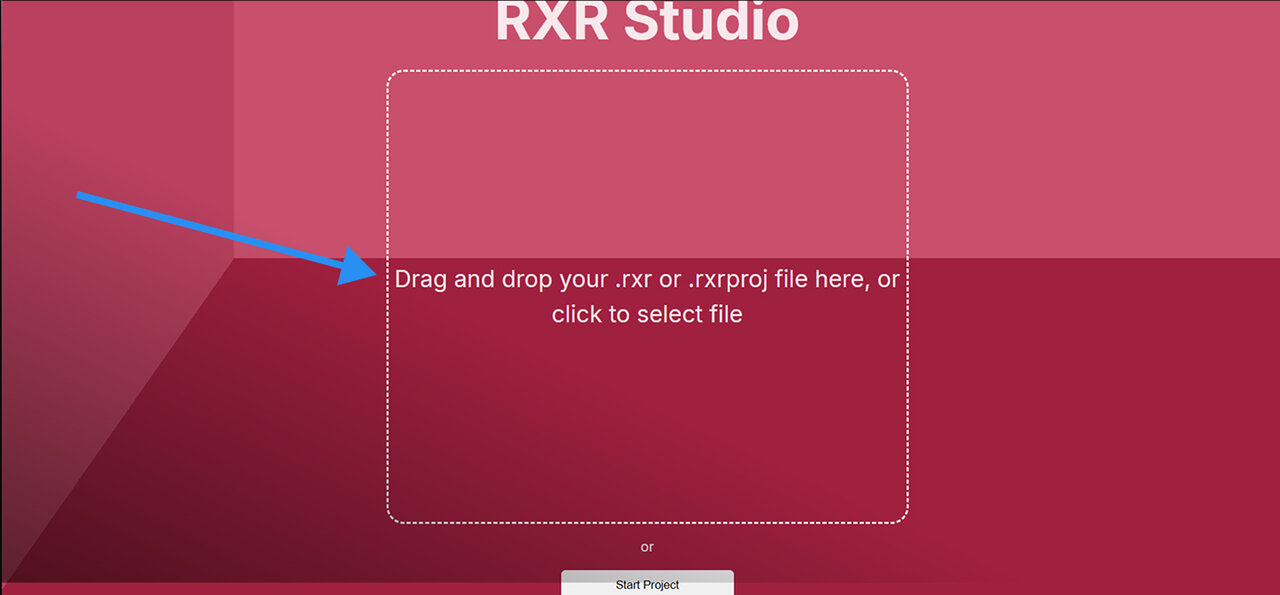
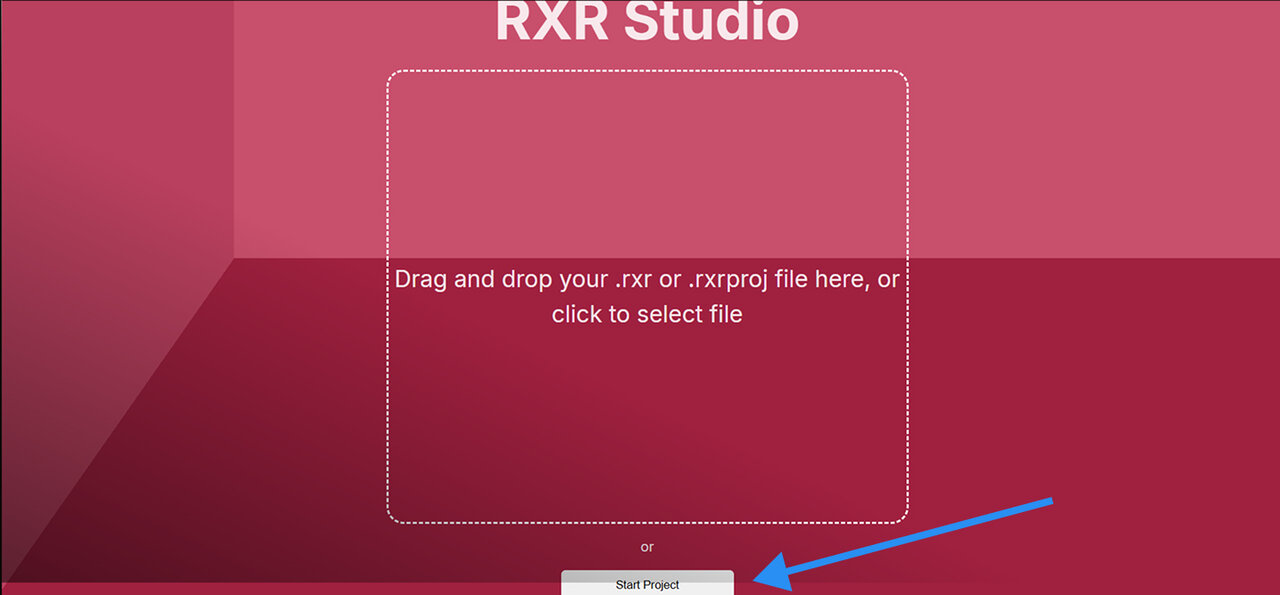
Next, open RecordXR Studio by typing cut.rxr.app in your browser. Drag and drop your RXR file into the window, or click "Start Project" to open an empty project.
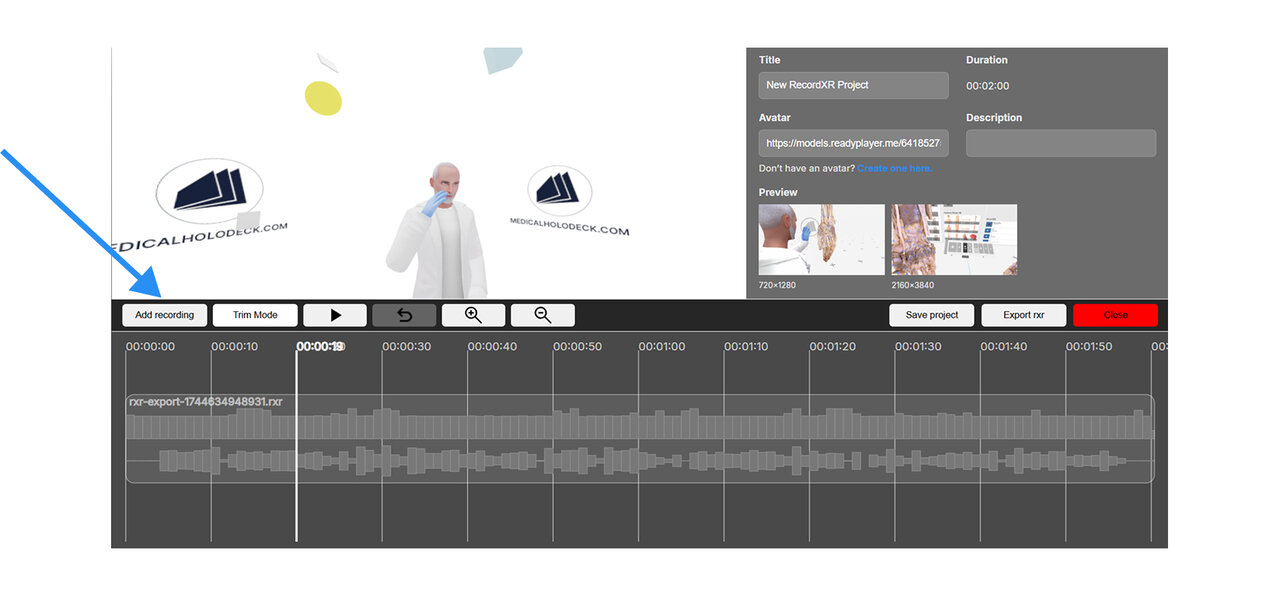
Click "Add Recording" and select an RXR file from your computer. You can only add one file at a time. The project keeps the metadata from the first file, but you can update it later if needed.
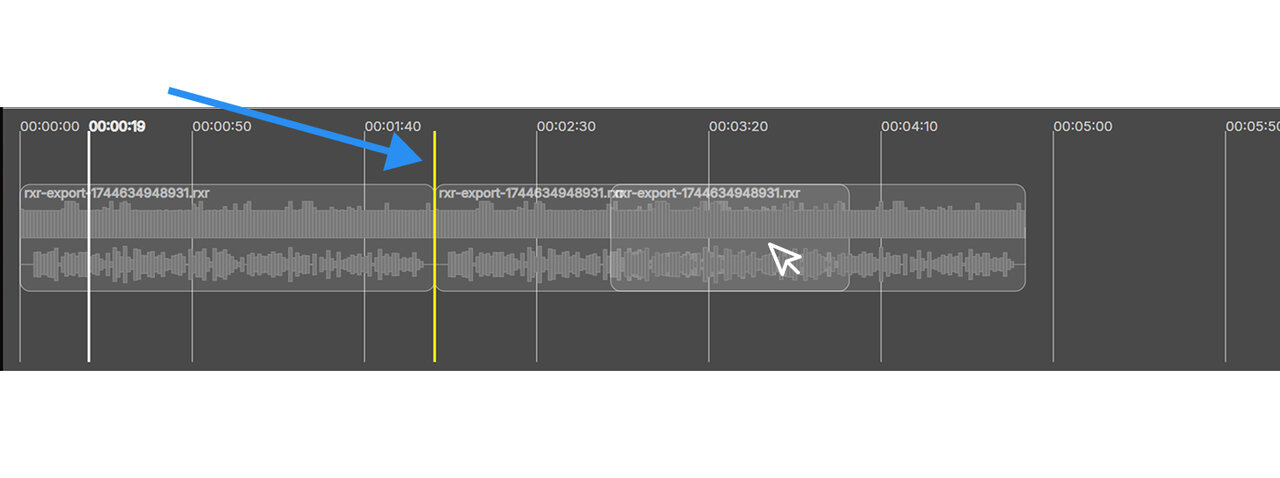
To preview a specific moment in the recording, move the playhead to the desired position on the timeline. Use your mouse to move around the 3D preview window. Click and drag to rotate, scroll to zoom, and position the camera as needed.
To rearrange recordings drag them to a new position. The yellow line shows where the clip will be placed.
To trim a recording, choose "Trim Mode". Red handles will appear at the start and end of each clip. Drag them to select the parts to remove, then click the yellow "Trim" button to confirm. To cancel trimming, click the red button.
To split a recording into two parts at a specific moment, move the playhead to the desired position and click "Cut". The recording will be divided into two separate clips that can be edited independently.
To watch your recording directly in the editor, click the play button. The playhead will move automatically while the recording plays. Press pause to stop playback.
Select the undo button to reverse your last action.
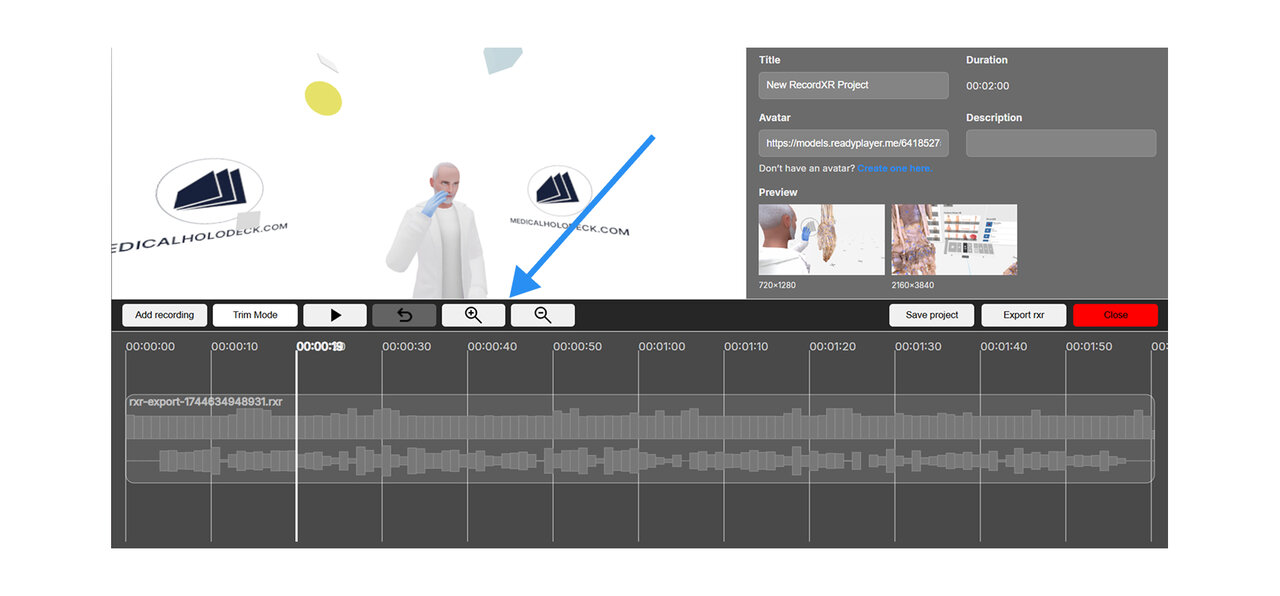
Use the zoom in and out buttons to adjust your timeline view. You can also use your mouse scroll wheel to zoom in or out on the timeline.
Click on the desired audio track to show audio editing functions.
To replace the audio in your recording, click "Replace Audio". Choose the audio file from your file browser that you want to use as a replacement.
Select "Translate Audio" to change the recording's language. Enter your Eleven Labs API key if you already have an account. If you don't, go to elevenlabs.io to create one.
If you want to save the current audio, click "Save Audio". It will be downloaded to your computer in MP4 format.
To permanently remove the recording, click "Delete Recording".
Click "Cancel" to close the window.
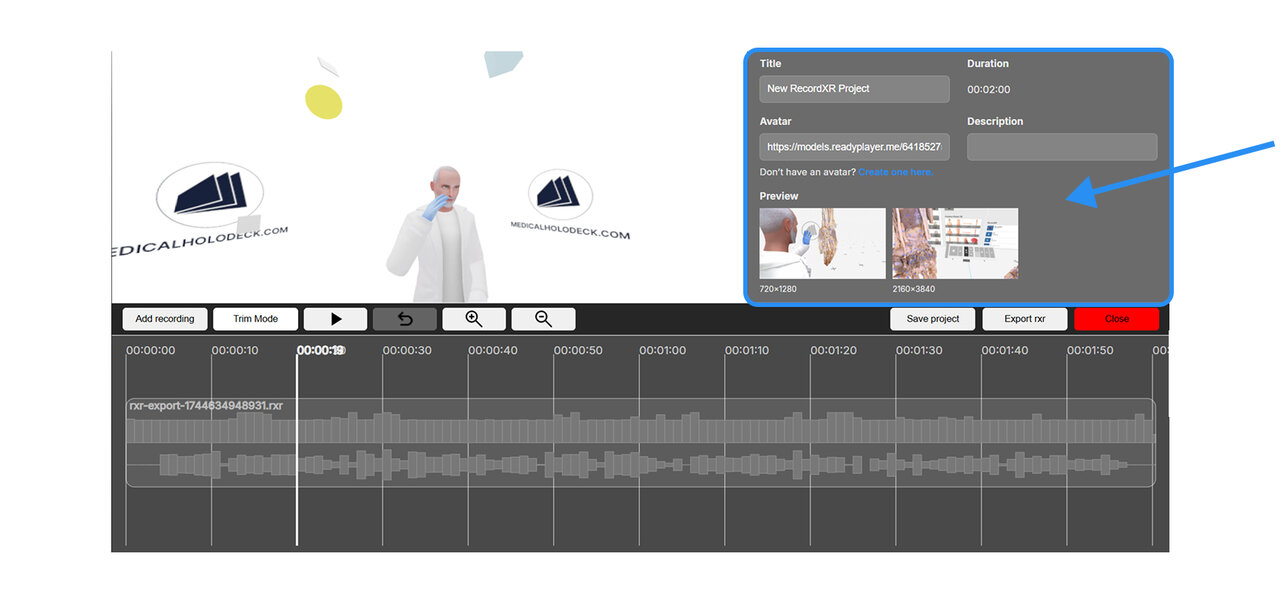
Go to the Metadata section to edit the project title, description, and preview images. Click the link below the avatar field to design your avatar. Once ready, paste its URL there. Choose "Reset" to undo the changes.
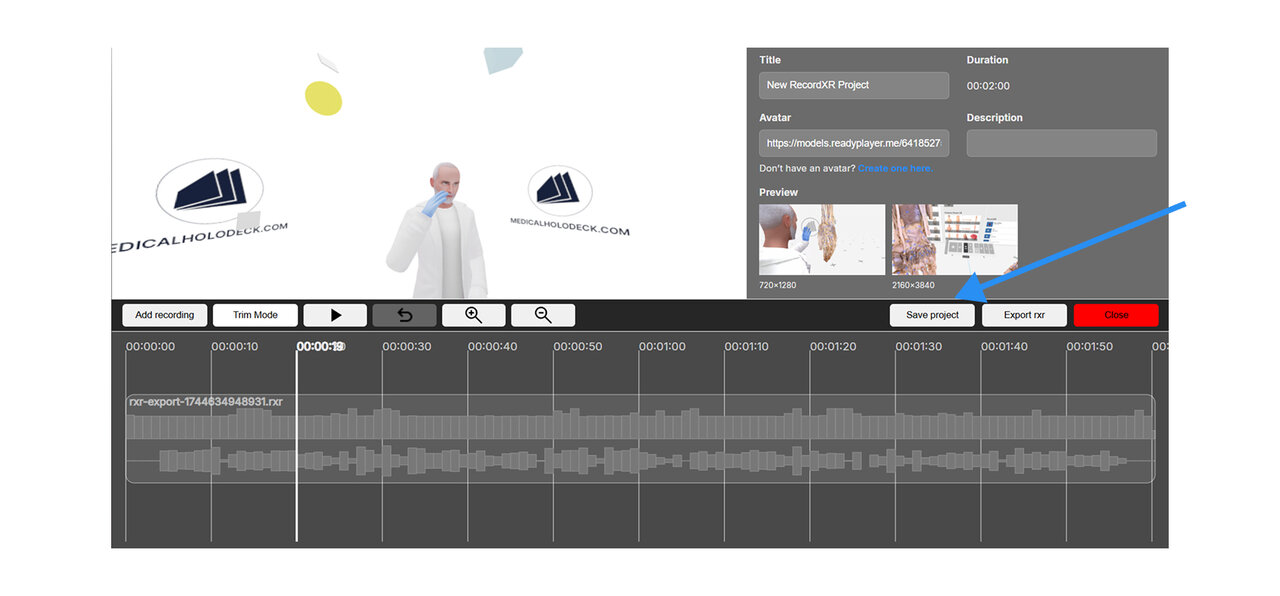
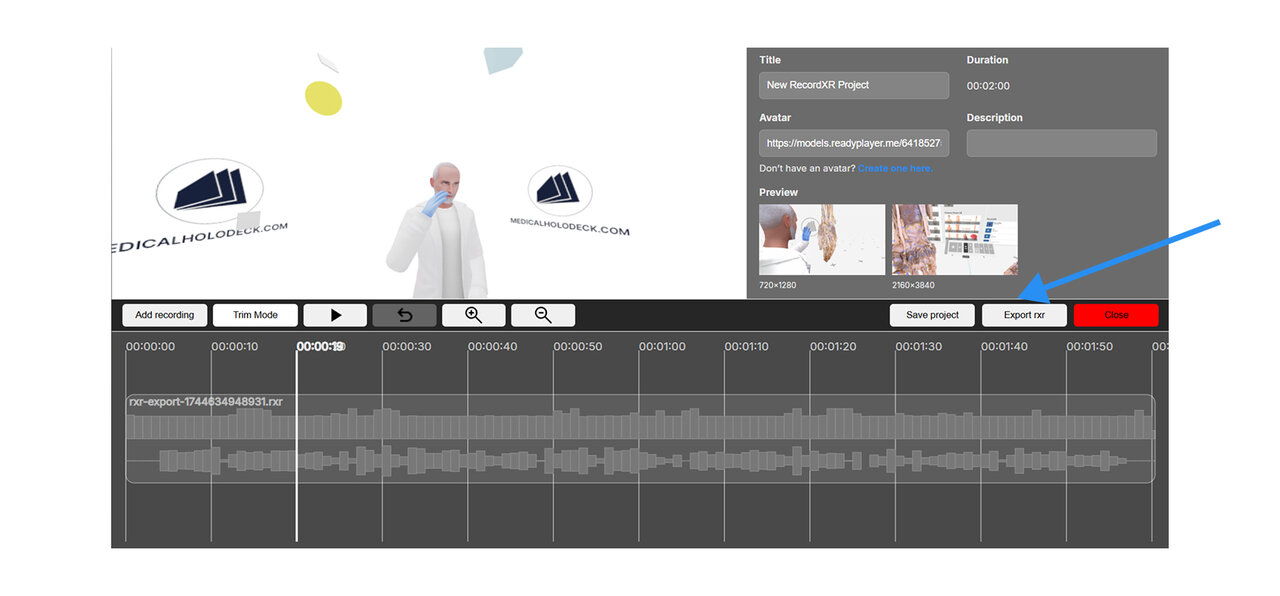
Click "Save Project" to download a project file. This file can be reopened later in RecordXR Studio. To generate a final RXR file, click "Export RXR".
7.A Quick start
7.A.V1.9-01
7.A.1
Get records from Medicalholodeck
7.A.1.V1.9-01
Navigate to the RecordXR section in the library panel. Locate the recording you wish to export and click the export/share button. The file will be saved as a .RXR file and automatically exported to your desktop.

To learn more about creating recordings in Medicalholodeck App, check the manual for RecordXR on the website.
7.A.2
Open RecordXR Studio
7.A.2.V1.9-01
Access RecordXR Studio here.
7.A.3
Open a project
7.A.3.V1.9-01
There are two ways to start a project:
Option 1: Drag & drop
Drop a .RXR or .rxrproj file into the designated area to start.
Option 2: start new
Click the start project button to open a new project.
7.A.4
Add recordings
7.A.4.V1.9-01
To add a recording to your project, click the add recording button and browse for the desired .RXR file on your computer. Recordings must be added one at a time.
Note that the project automatically keeps the metadata from the first recording uploaded. It can be changed later in the metadata section.
New recordings are placed at the end of the timeline.
7.A.5
Zoom in/ zoom out
7.A.5.V1.9-01
To adjust the timeline view use zoom in/out. Zooming in for precise edits or out for a full view is especially helpful when trimming or rearranging.
7.A.6
Change the order
7.A.6.V1.9-01
To reorder recordings within the timeline, click and drag a recording to the desired position marked by a yellow vertical line. Use the keyboard arrow keys to move across the timeline as the timeline does not scroll automatically.
7.A.7
Trim
7.A.7.V1.9-01
To trim a recording, click the trim mode button. Red handles will appear at the beginning and end of each file. Drag these handles to select the segment to be cut off and click the yellow trim button to apply the changes.
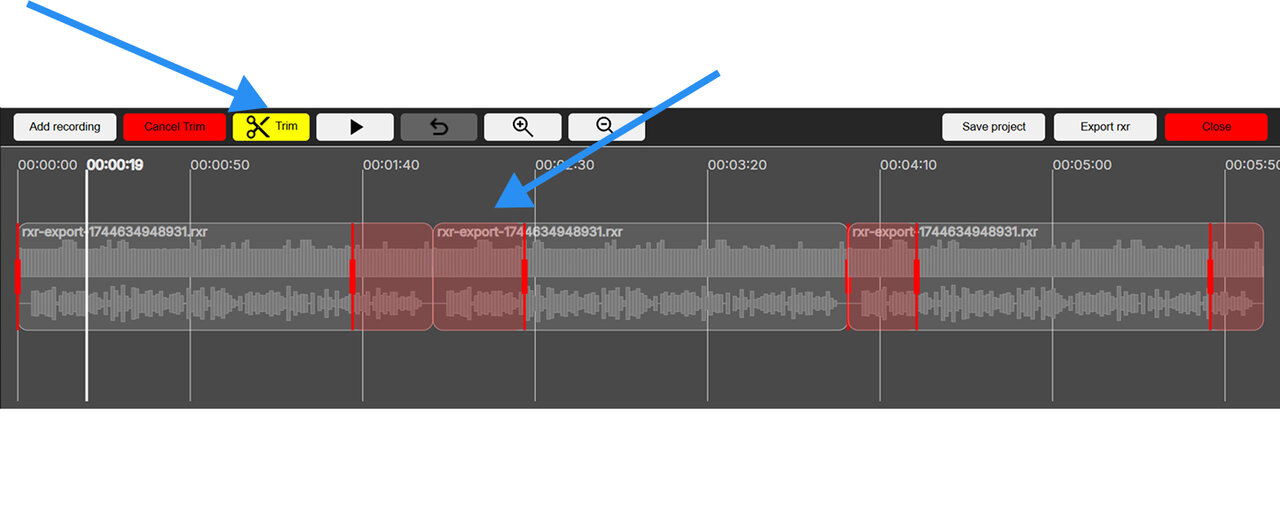
To exit trim mode without applying any changes, click the red cancel trim button.

7.A.8
Set the metadata
7.A.8.V1.9-01
The title, description, and preview icons for your project can be edited in the metadata section.
7.A.9
Add an avatar
7.A.9.V1.9-01
A customized avatar can be added to your recording. Click the “Create one here” link below the field to design your avatar. Once ready, copy its URL and paste it into the avatar field within the metadata section.
7.A.10
Saving the project
7.A.10.V1.9-01
To save your project, click the save project button. The project will be downloaded to your computer with the .rxrproj extension.
Note that this is a project file, not a recording. It can only be reopened within RecordXR Studio.
7.A.11
Export a .RXR file
7.A.11.V1.9-01
To export a recording from the opened project, click the export RXR button. The recording will be saved to your computer as a .RXR file and can then be opened in Medicalholodeck.
7.A.12
Exit the platform
7.A.12.V1.9-01
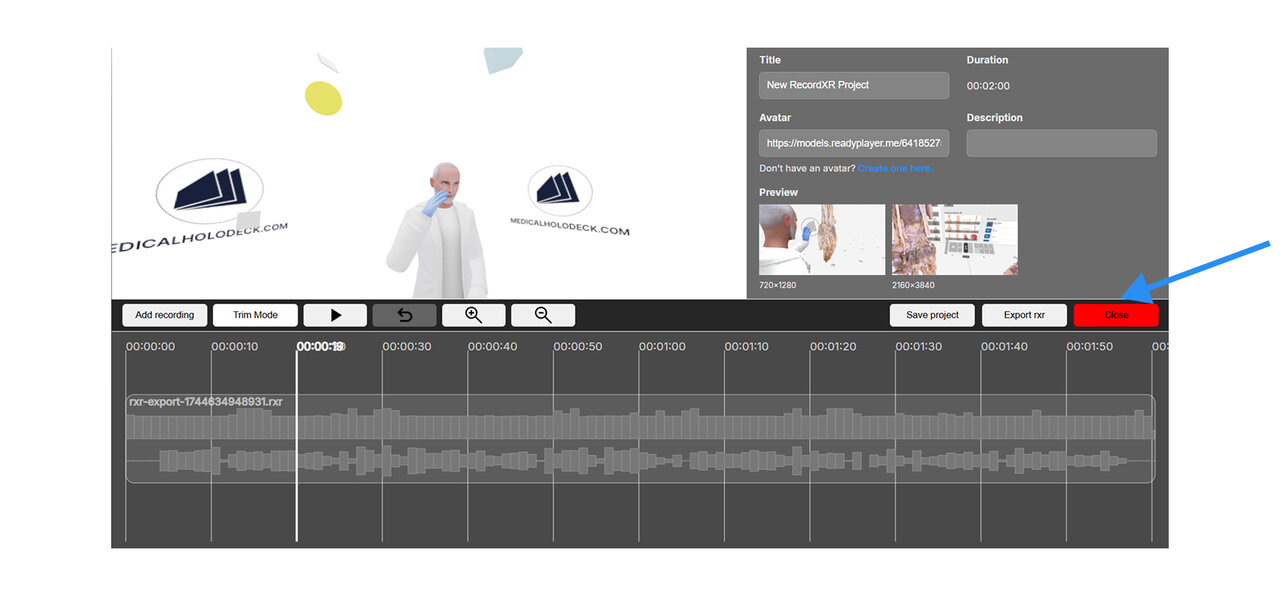
To exit RecordXR Studio, either click the close button or close the browser tab.
Be sure to save your work before exiting to avoid losing any progress.
7.A.13
Open the recording
7.A.13.V1.9-01
To import your newly created recording into the Medicalholodeck:
- Open the app and navigate to the library panel.
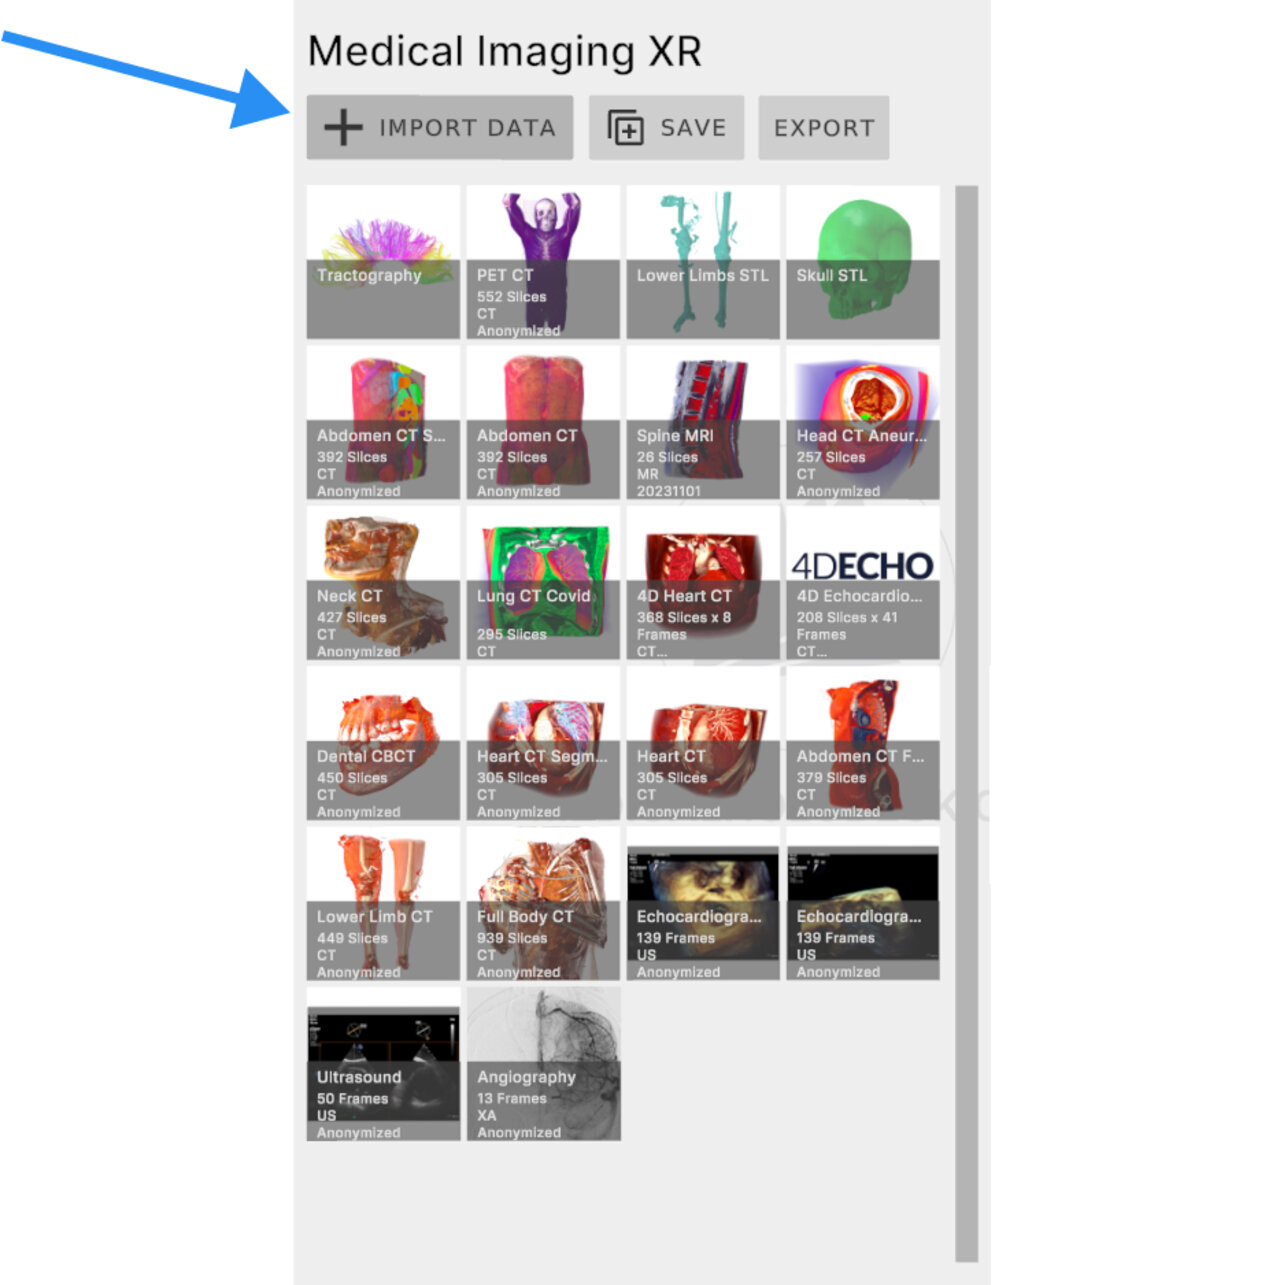
- Locate the Medical Imaging XR section and click the import data button.
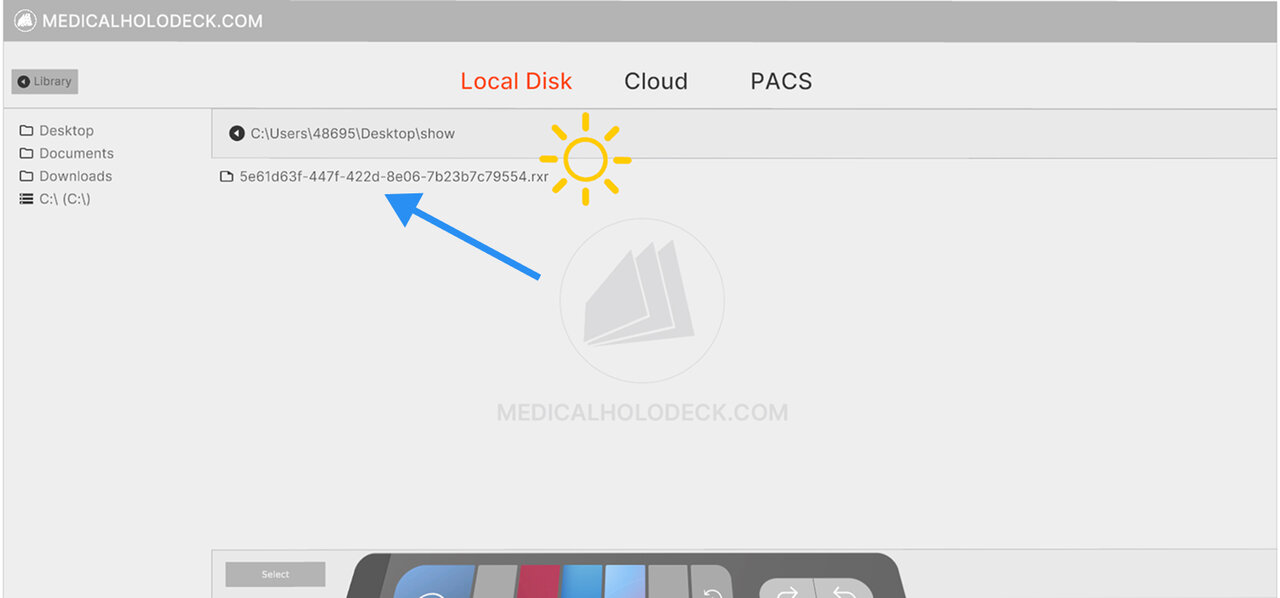
- Find and select your .RXR recording file from your computer.
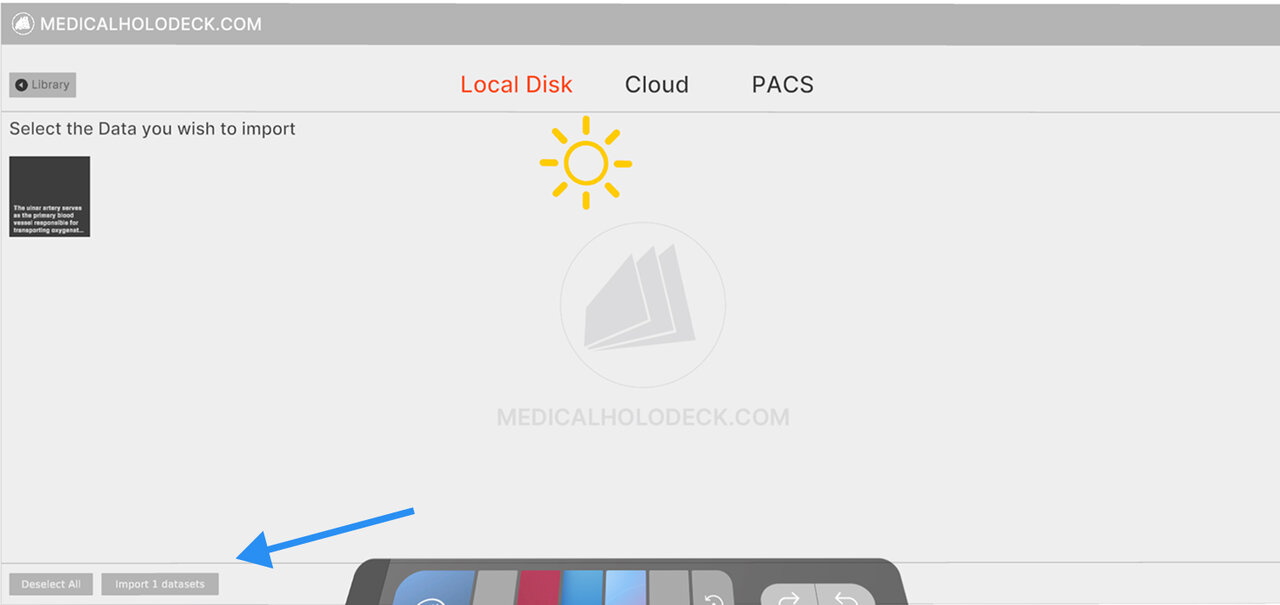
- Confirm the import. The record will appear at the top position under the RecordXR section.