
2.2 Medical Imaging panel
2.2.V1.9-01
You can edit any DICOM data using functions from the Medical Imaging panel, which appears when a DICOM dataset is loaded.
The Transfer Function at the top allows you to adjust transparency and assign colors to specific Hounsfield Units, using color Pins. Hounsfield Units, or HU, allow you to filter DICOM data based on radiodensity.
To add a new pin, click anywhere within the section. Move the pins vertically – to adjust transparency, or horizontally to assign colors to specific HU values. Click at a pin to open the additional panel on the right, where you can change the pin's color or remove it.
In the Tissue Filter section, use the arrow buttons or drag the pins along the slider to set the visible HU range.
You can also control how colors are distributed across the HU units. When the Map colors to range option is selected, colors adjust automatically to fit the current HU window, keeping the full color range visible. When this option is unselected, colors are fixed to specific units, so narrowing the HU range limits the visible colors.
Zooming in on the selected range allows you to make adjustments within a smaller window, while zooming out restores the slider to show the entire HU range.
To save the transfer function, press the 'Add' button below. Switch between the saved functions by clicking on their icons. You can also export them to your desktop or delete them.
Use AI Segmentation to detect specific parts in a dataset. Choose a suitable model from the list and press 'Start'. Once the process is complete, the visibility and transfer function of each detected part can be edited separately using the Segmentation panel.
To convert the dataset into an STL format, press the 'Generate mesh' button. Use the Tissue slider to set the ISO Value that controls which tissues appear in the mesh. The Mesh Quality balances mesh detail and STL file size. Press the 'Smooth' button to smooth out the created mesh. Click 'Export STL' to save the file to your desktop. Press 'Done' to add the mesh to the library.
Toggle the visibility of the Multiplanar and display the DICOM data in axial, sagittal and coronal planes. Use the sliders to choose specific planes to display and interact with the 'Zoom in' and 'Zoom out' icons to adjust their scales. Modify the window for adjusting the range of grayscale values displayed and threshold for changing the displayed HU range.
The Edge Filter improves the clarity of tissue boundaries in the DICOM data. Use the arrow icons or drag the pins along the slider to adjust the filter. Move it to the left to display smooth areas or to the right to highlight tissue transitions.
Transfer function, AI segmentation and edge filter settings can be saved as option presets by selecting the 'Add' option located on the left side of the panel. To load a different preset, click its section. You can also rename presets, save them to your desktop or remove them.
The Quality slider controls how many slices are used for rendering, balancing performance and visual quality. Use it to ensure the best VR experience based on your device’s capabilities.
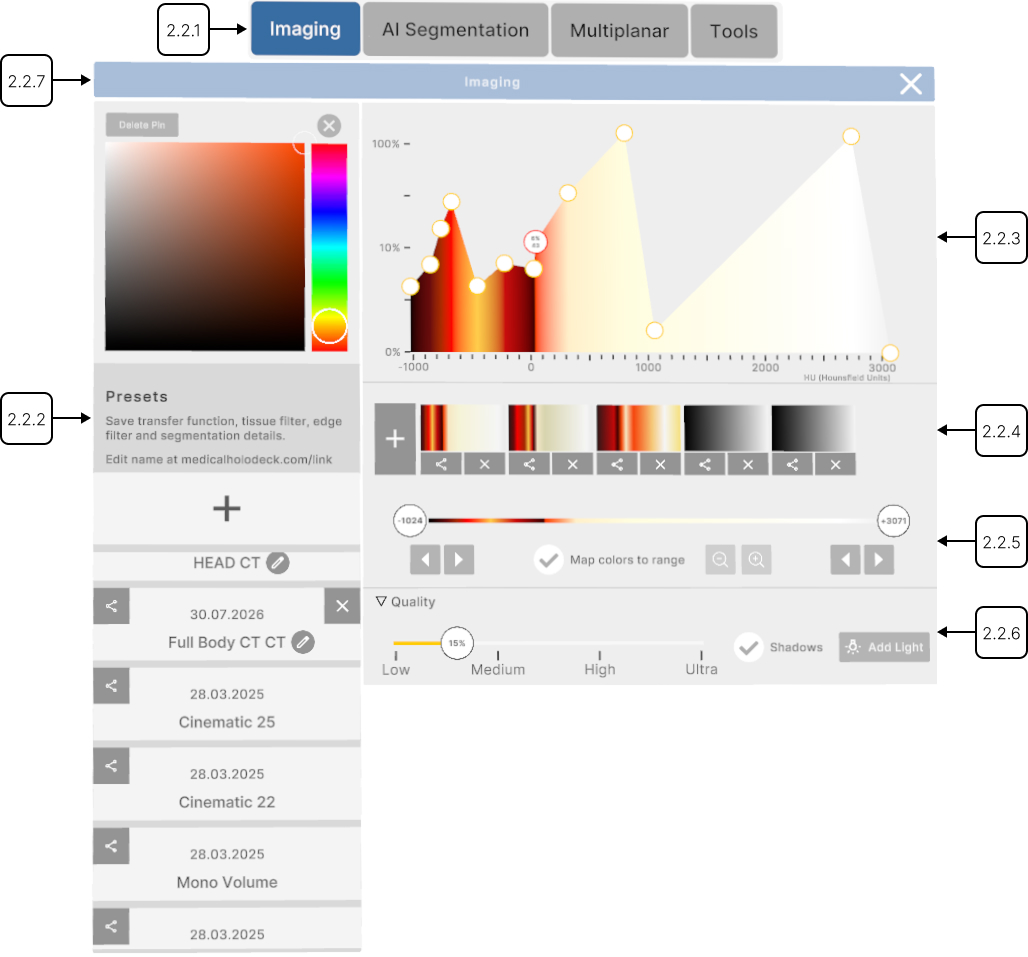
2.2.1
Panel selector
2.2.1.V1.9-01
Allows you to open additional panels with tools for editing DICOM data. Select a panel name to open it.
The panels appear around you. You can show or hide them and move them to arrange the workspace to suit your needs.
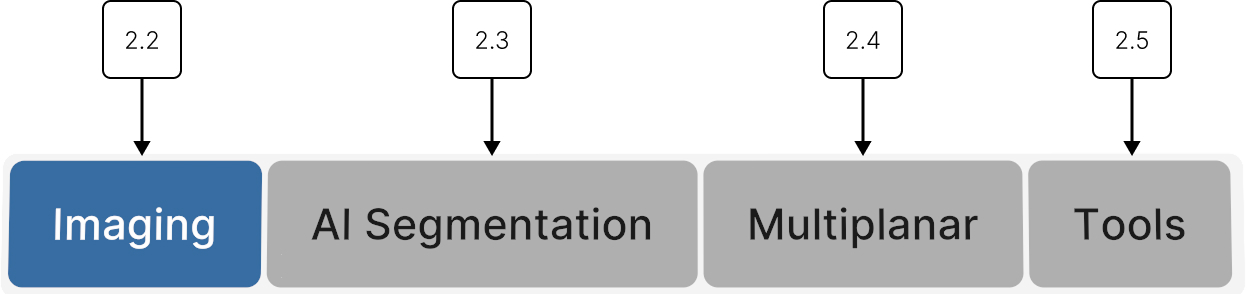
2.2.2
Option preset
2.2.2.V1.9-01
Manages DICOM presets. Option preset is a saved configuration of display and processing settings. Select, create, edit, or delete built-in and custom presets here.
2.2.2.1
Add
Saves your color schema, transfer function, edge filter, and segmentation as a new preset. Point at the + button and press the trigger to make a new preset. It will appear at the top of the list.
2.2.2.2
Export
Saves the preset into your output folder.
2.2.2.3
Preset
Loads a saved preset. Select it with the trigger to apply.
2.2.2.4
Rename
Allows changing the name of the preset. Point the laser at the pen button and press the trigger. A keyboard will appear. Type a new name and save the changes by pressing the done button. Alternatively, you can save by clicking the pen button again or closing the keyboard.
2.2.2.5
Delete
Deletes the selected preset.
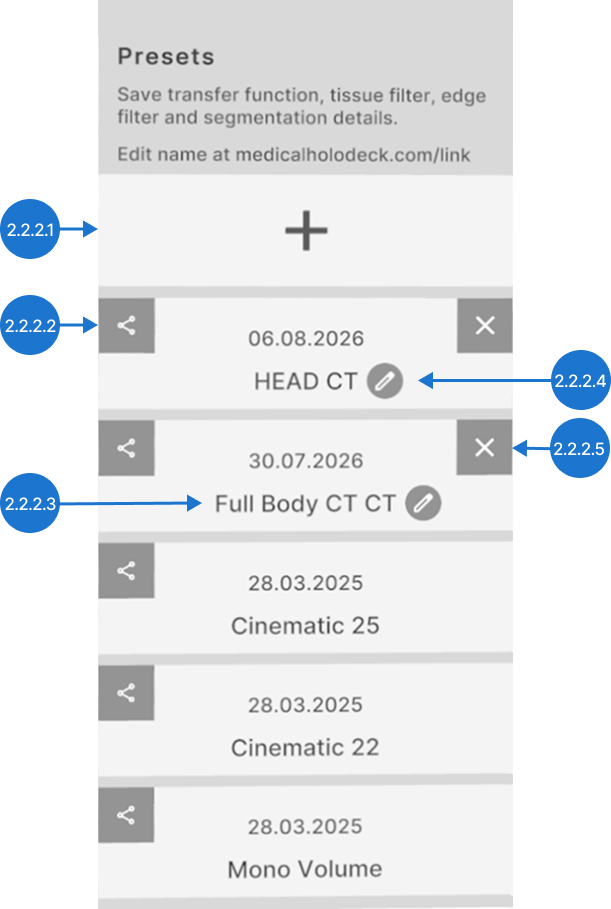
2.2.3
Transfer function
2.2.3.V1.9-01
Enables setting transparency and colors to specific Hounsfield Units (HU) using color pins.
2.2.3.1
Color pins
They adjust transparency and assign colors to specific Hounsfield Units (HU).
To add a pin, click on an empty spot on the graph.
To change transparency, move the selected pin vertically and release the trigger. Transparency ranges from 0% to 100% on a logarithmic scale.
To assign a specific color to an HU value, move the selected color pin horizontally and release the trigger.
2.2.3.2
Delete pins
Deletes a color pin from the transfer function. Select the pin with the laser, then press the delete pin button.
2.2.3.3
Color picker
Allows changing a pin's color. Select the pin with the trigger, then choose a new color.
2.2.3.4
Close pin options
Closes color picker.
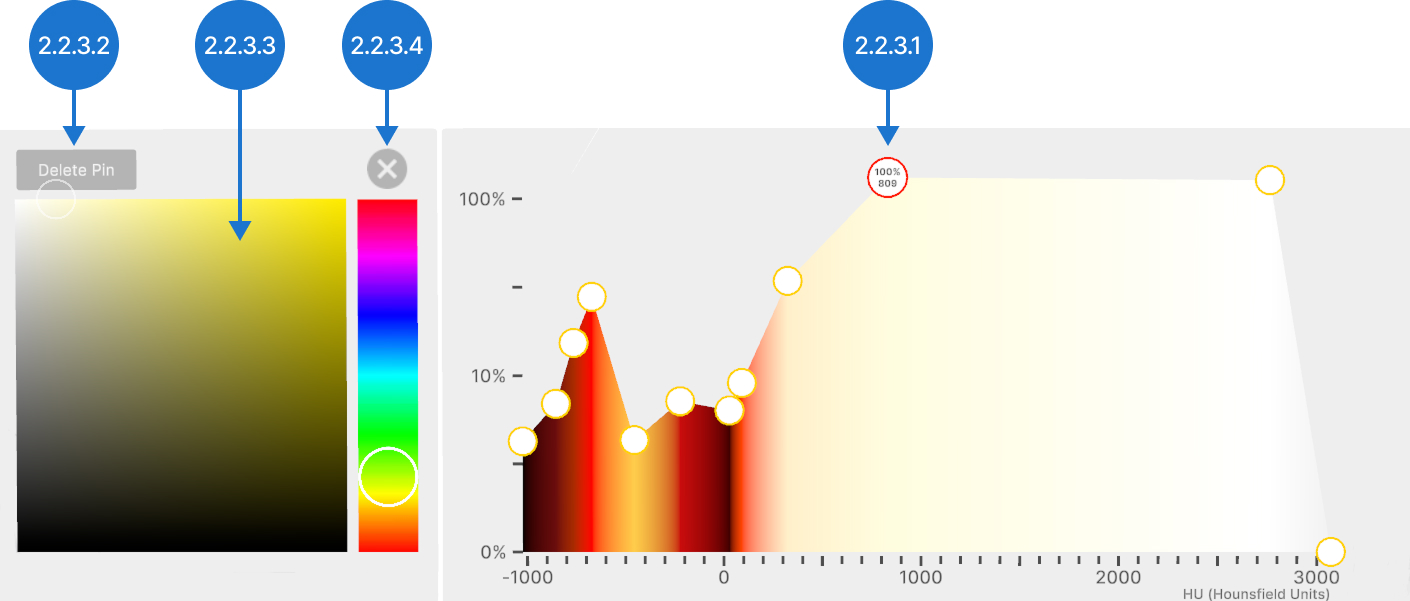
2.2.4
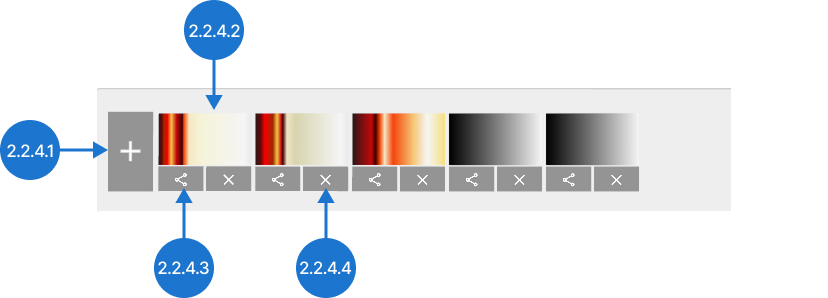
Transfer function preset
2.2.4.V1.9-01
Manages DICOM presets. Transfer function preset is a saved configuration of a transfer function and a color schema. Select, create, edit, or delete built-in and custom presets here.
2.2.4.1
Add
Saves your color schema and transfer function as a new preset. Press the + button with the trigger to make a new preset. It will appear at the top of the list.
2.2.4.2
Preset
Loads a saved preset. Select it with the trigger to apply.
2.2.4.3
Export
Saves the preset into your output folder.
2.2.4.4
Delete
Deletes selected preset.
2.2.5
Tissue filter
2.2.5.V1.9-01
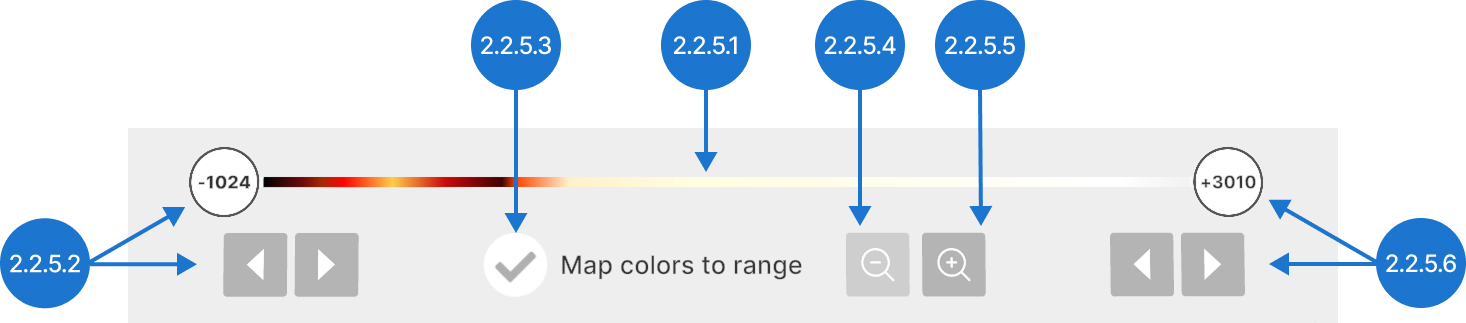
The tissue filter section adjusts the visible range of DICOM data based on Hounsfield Units (HU). It also allows switching between relative and absolute color values.
2.2.5.1
Slider
Represents the range of the Hounsfield Units (HU).
2.2.5.2
Min HU
Adjusts the lower Hounsfield Unit (HU) value. Select the slider with the trigger and move the slider left or right, then release. Use the arrow to decrease/ increase the value by 1.
2.2.5.3
Map colors to range
Toggles between color modes. When selected, colors adjust to fit the current HU window, keeping the full color range visible. When unselected, colors are fixed to specific Hounsfield Unit (HU), so narrowing the HU range limits visible colors.
2.2.5.4
Zoom out the HU range
Resets the slider to show the full possible HU range.
2.2.5.5
Zoom in the HU range
Sets the currently selected range as the new maximum range. This makes it easier to make adjustments within a smaller range.
2.2.5.6
Max HU
Adjusts the higher Hounsfield Unit (HU) value. Select the slider with the trigger and move the slider left or right, then release. Use the arrow to decrease/increase the value by 1.
2.2.6
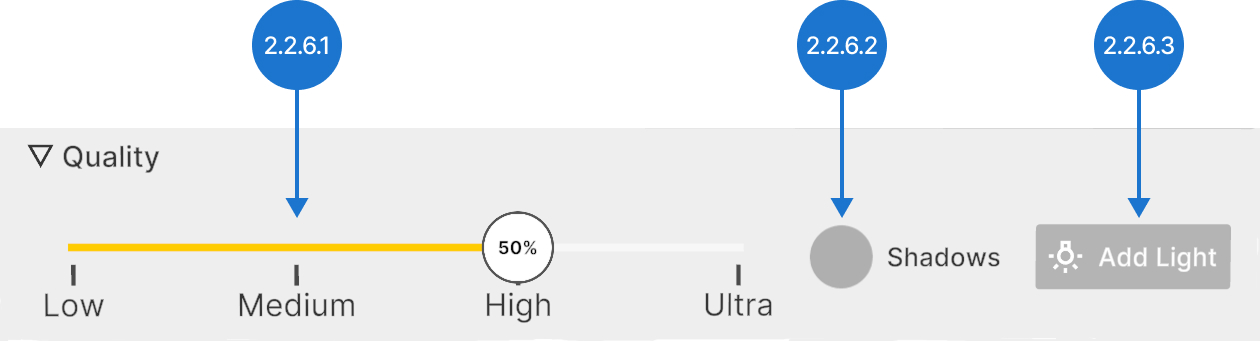
Quality settings
2.2.6.V1.9-01
Quality settings help balance performance, lighting, shadows and visual clarity. If your device slows down with large and numerous files, lowering the quality can help it run more smoothly. You can adjust quality settings for each individual model. Note that quality settings above 50% offer only small visual improvements but require significantly more performance.
2.2.6.1
Slider
Adjusts the density of the volume. Higher values provide more detail but require more processing power.
2.2.6.2
Shadows
Toggles visibility of shadows created by the light sources.
2.2.6.3
Add light
Adds an additional movable light source, shown as a yellow sun, together with its control panel. Use the slider to adjust the light intensity. You can add up to four additional light sources to each model.
2.2.7
Handle
2.2.7.V1.9-01
The top bar of every panel acts as a handle allowing you to reposition it to arrange the workspace to suit your needs. Hover with your laser, press and hold the trigger, drag the panel to your desired location, then release the trigger to place it.